DIY hallway upgrade – practical wainscotting and coat rack set-up with decoflair
Looking to refresh your hallway with an aesthetic and practical little upgrade? Look no further. In this article, we will explain how to install a wainscotting and a colourful matching coat rack in a few easy steps to make your hallway that little more welcoming.
WHAT YOU’LL NEED
Quantities for the respective items on the following list will of course depend on the dimensions of your walls and how extensively you wish to decorate it. In this article, we will give you a short step-by-step guide which you can follow regardless of quantities and amounts.
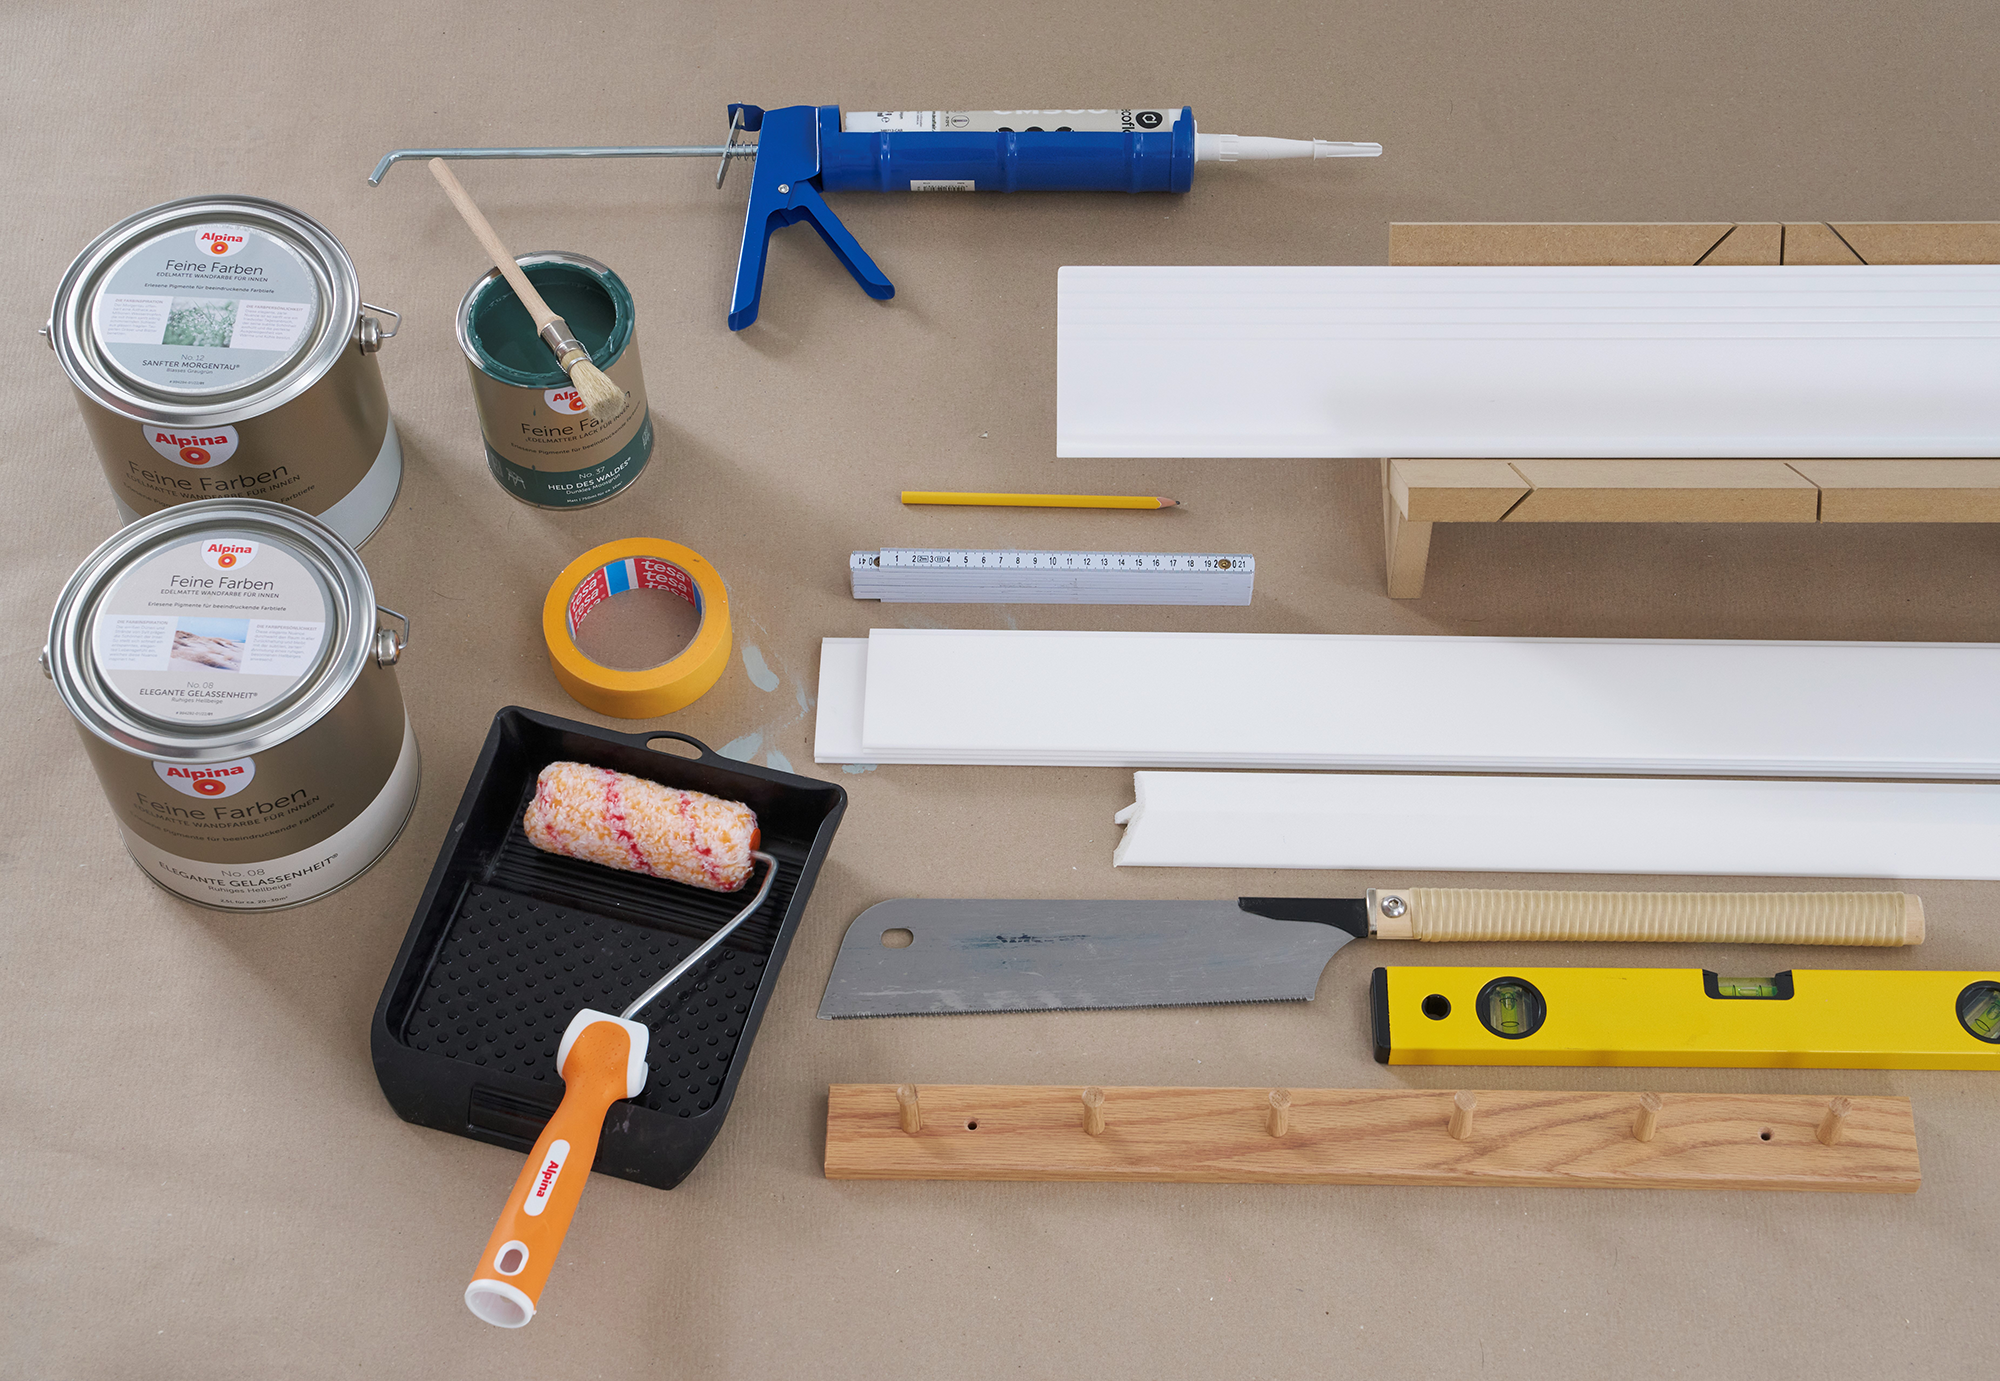
Essential decoflair items
- CBC2 cover skirtings (or regular C12 skirtings if you have no old skirting to cover).
- CP1 wainscotting profiles
- CL13 chair rails
- decoflair CM500 glue
- MB1 mitre box
Other must-haves
- Large tooth saw
- Paint roller
- Pencil
- Folding rule
- Paint brush
- Spirit level
- Paint tray
- Some masking tape
- Some paint in the colour(s) of your choosing
- Wooden coatrack
- Cartridge applicator gun
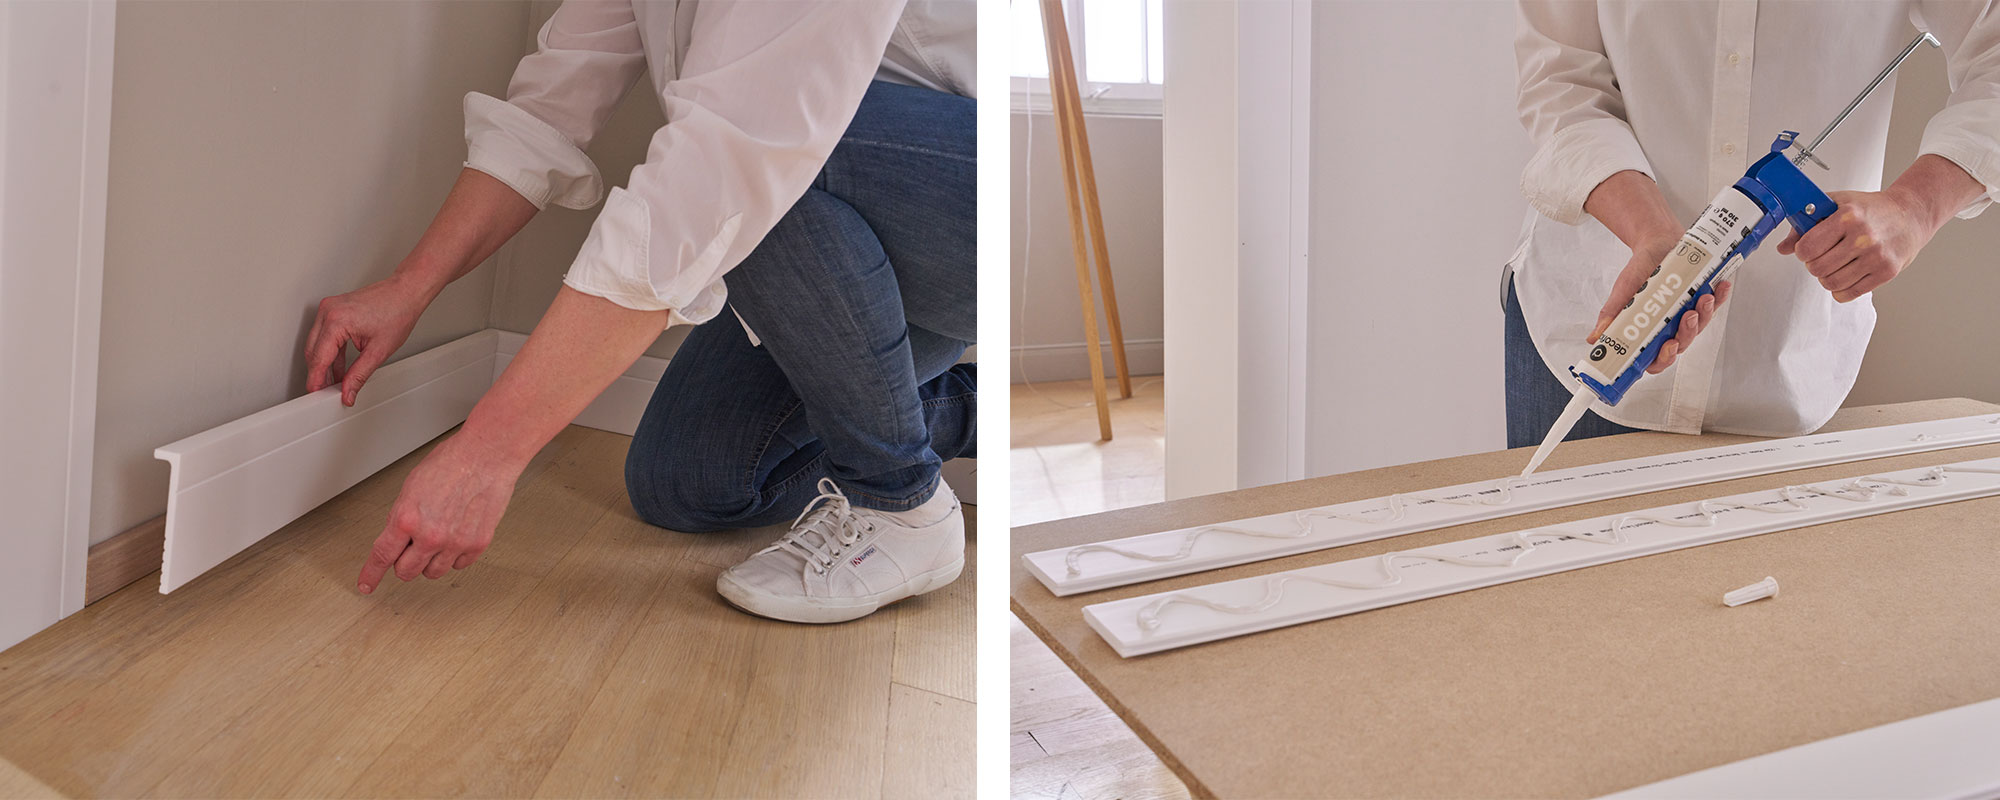
STEP 1: cut your profiles to the right length
Start off by measuring how much you are going to need of each profile for your installation and cut them all to the right size. If you are decorating an interior corner of a room like we have done here, make sure to cut 45° angles using your saw and mitre box on the relevant ends of the profiles. The same goes for the coat rack. If you need more detailed explanations regarding the cuts, check out our installation videos on our YouTube channel.
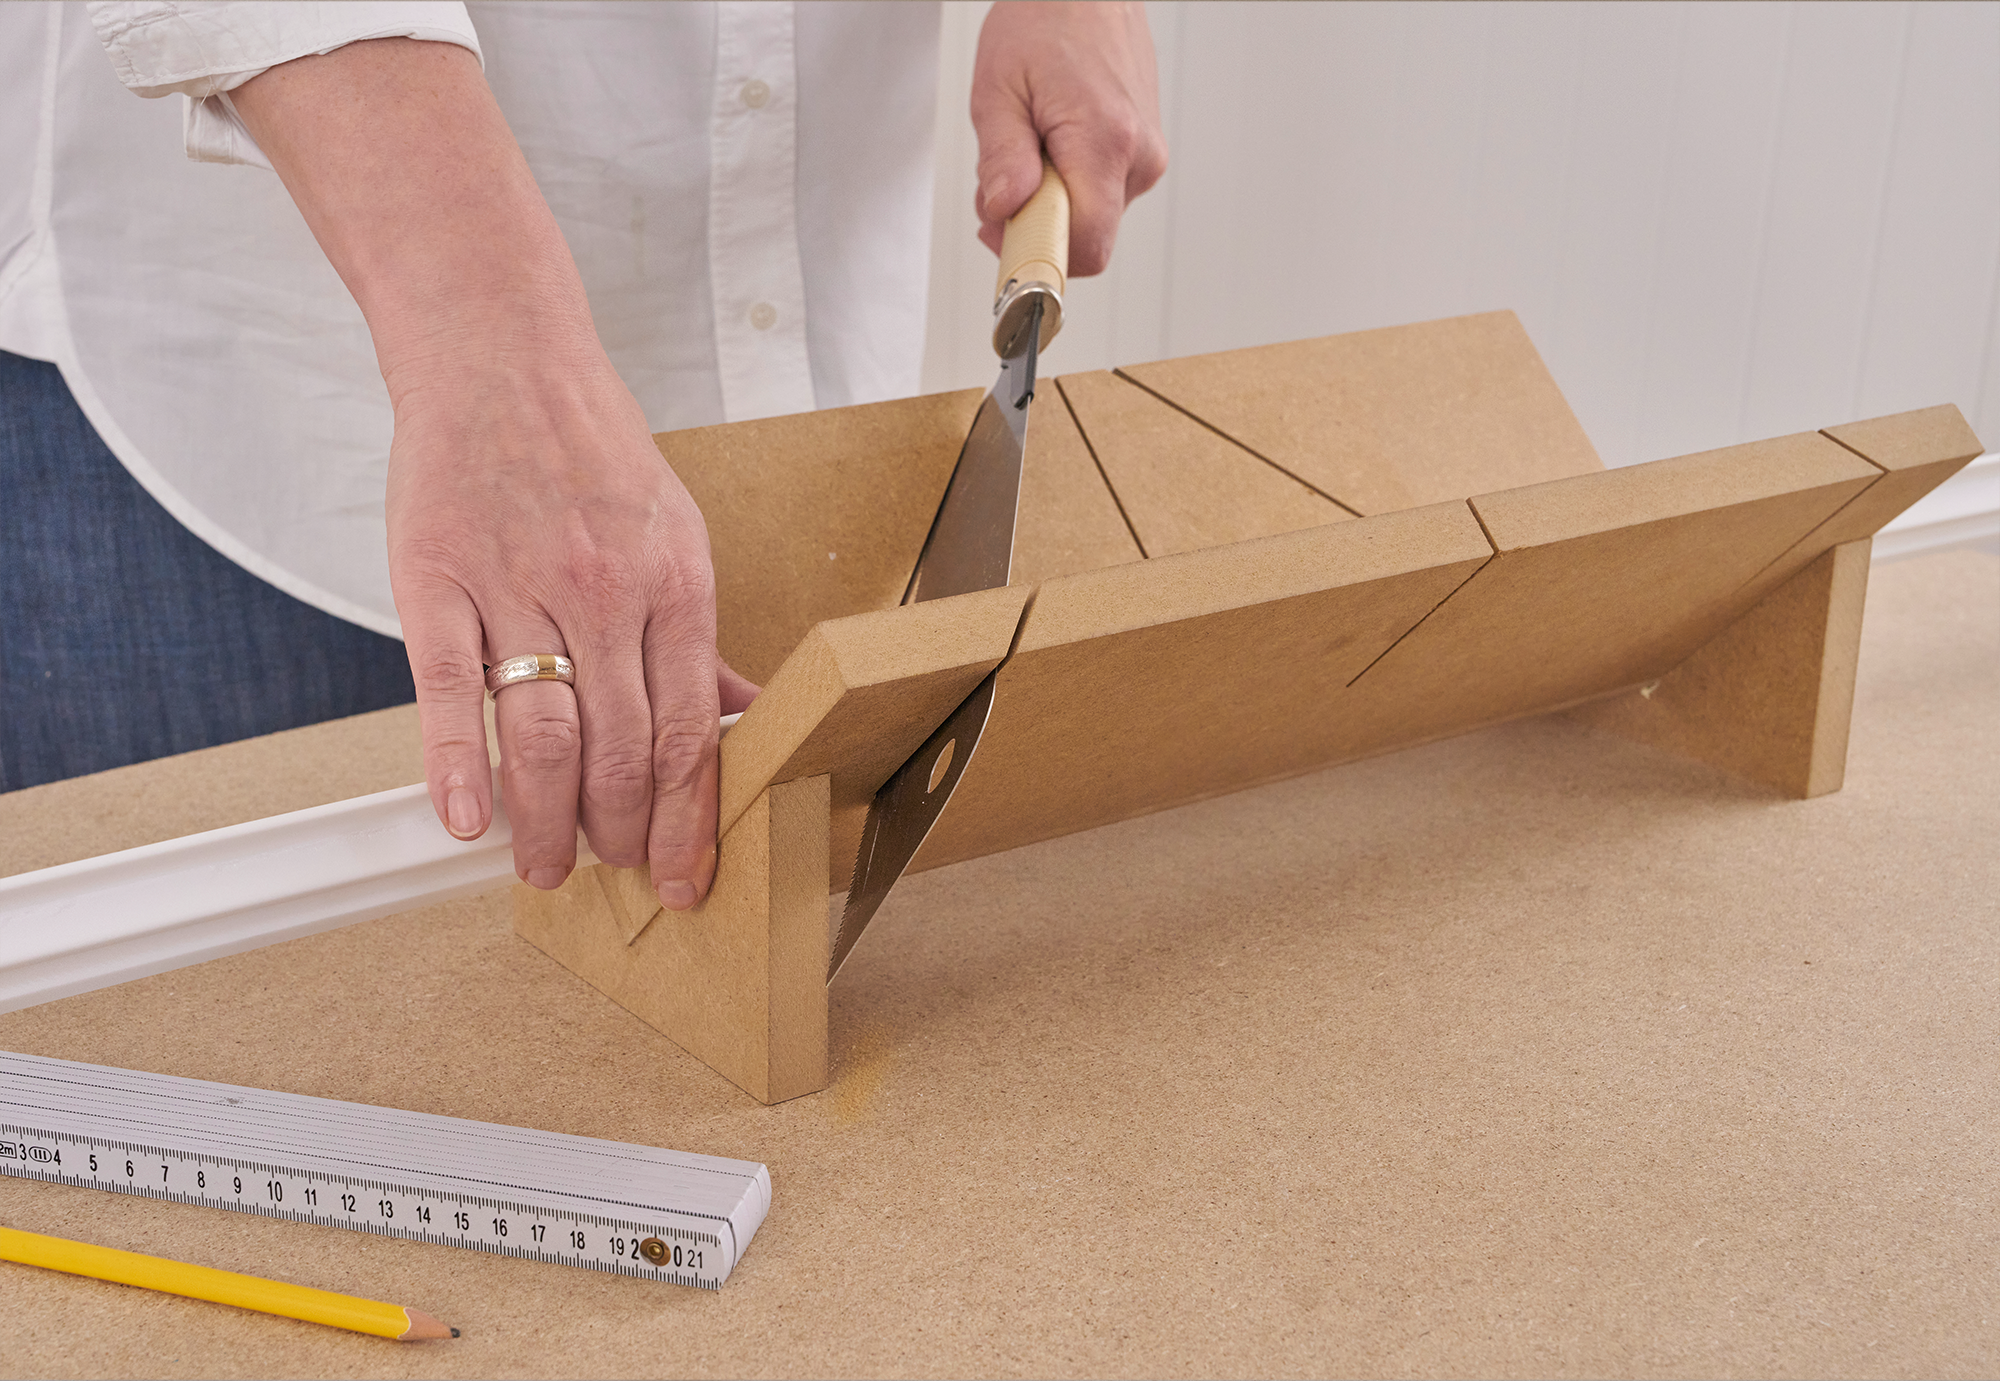
Insider tip: the CP1 profiles come at an ideal 1,22m length for wainscotings so these won’t even need to be cut.
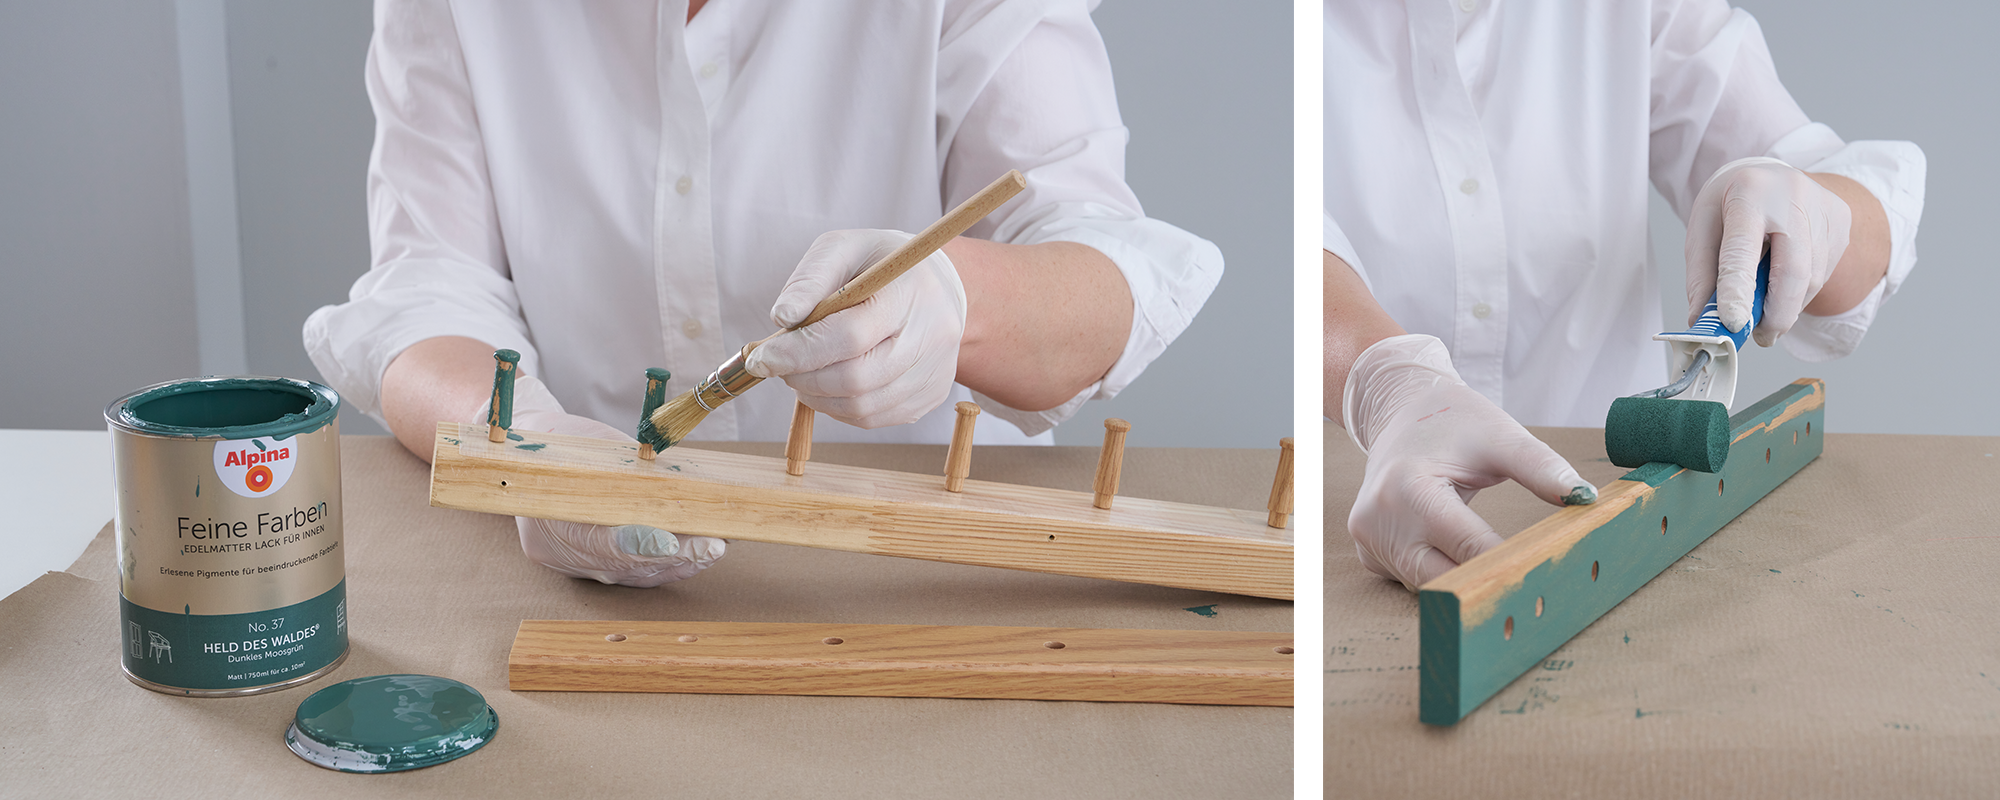
STEP 2: customize your coat rack
Time to take your coat rack (which should be cut to the right size by now) and give it a personal touch. We decided to paint ours in a warm, dark green tone to give the installation some character and a little bit of an edge.
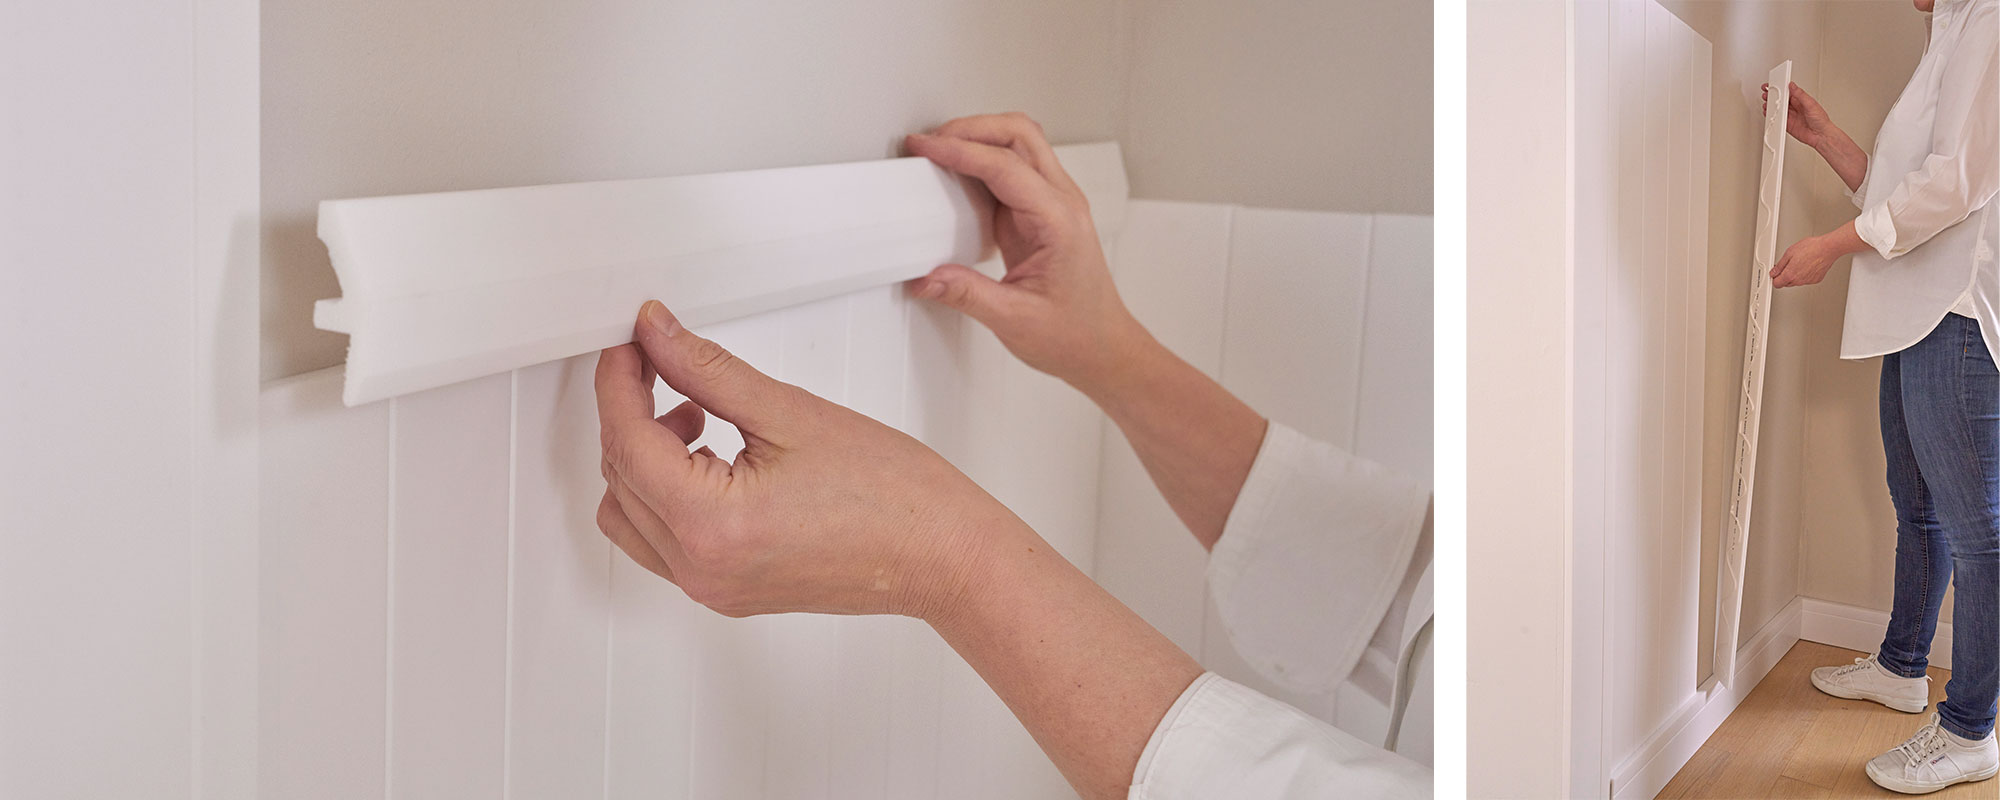
STEP 3: Install the profiles
The best way to install your wainscotting is to go from the bottom up. So, start off by fixing your skirting or cover skirting. Using your glue gun, generously apply continuous stripes of CM500 glue on each adhesive surface at the back of the profile and simply press them against the base of your wall. Continue with the CP1 boards; apply generous stripes of glue on the back of each board and plug each one into the next against the wall. Finally finish your wainscotting by topping it off with the CL13 profile.
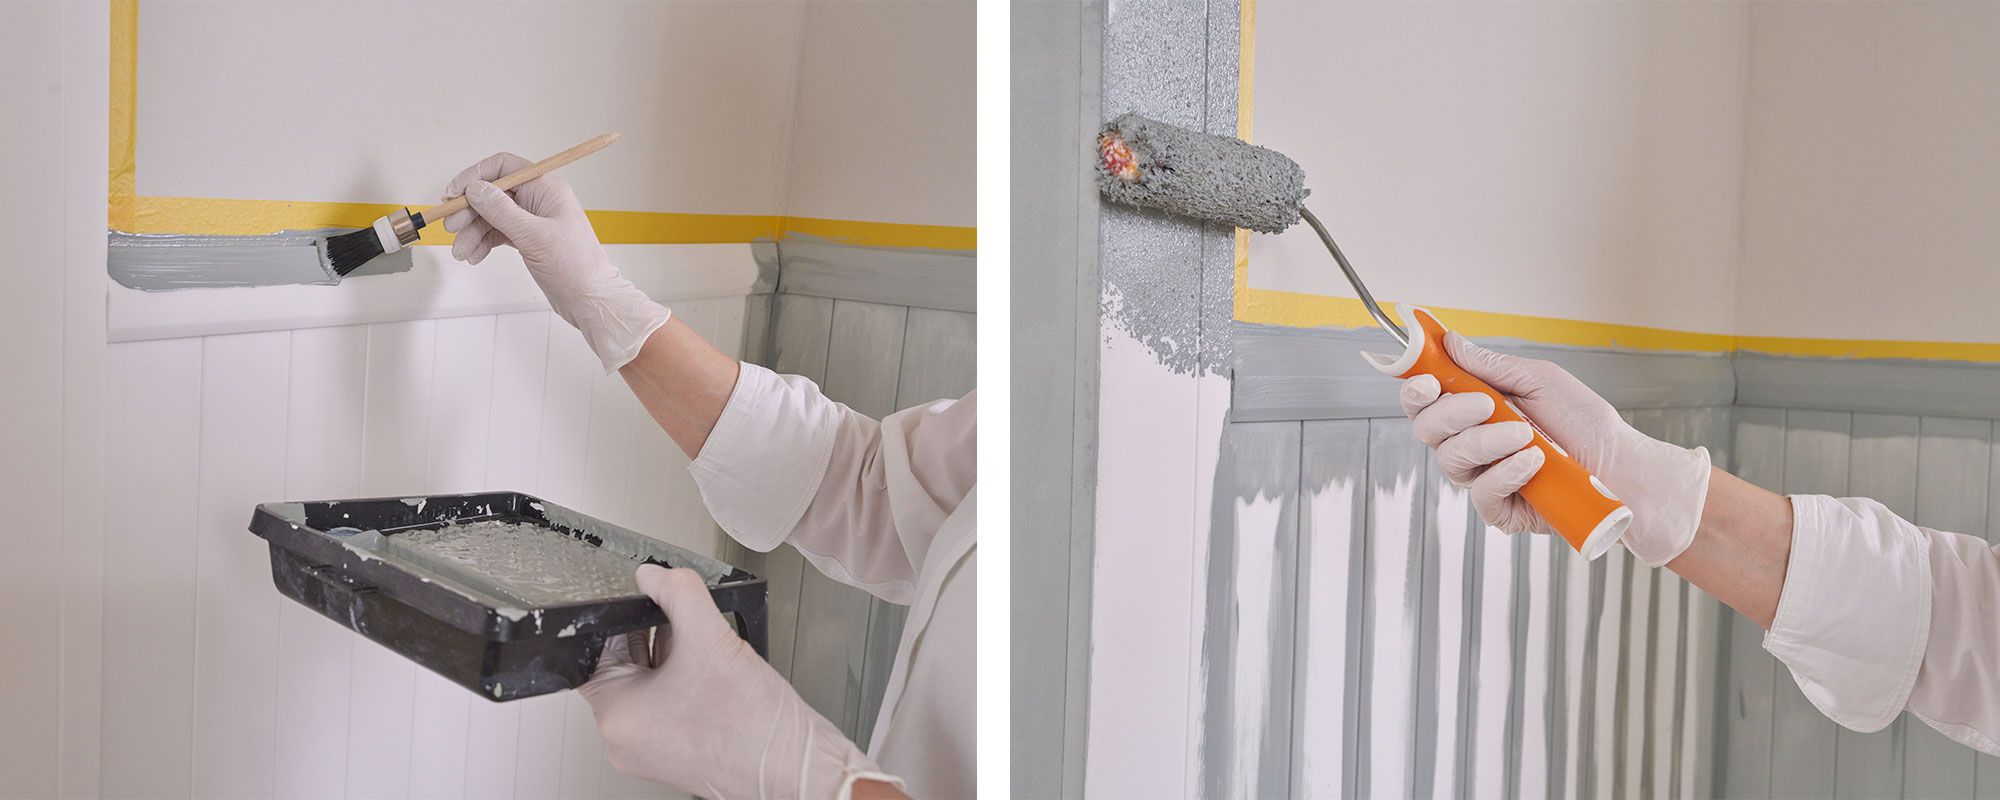
STEP 4: Paint the profiles
Once the profiles are installed and the glue is dry (for at least 6 hours), you can paint the installation in the colour of your choosing. Apply some masking tape on the wall right above the profiles to ensure a clean result.
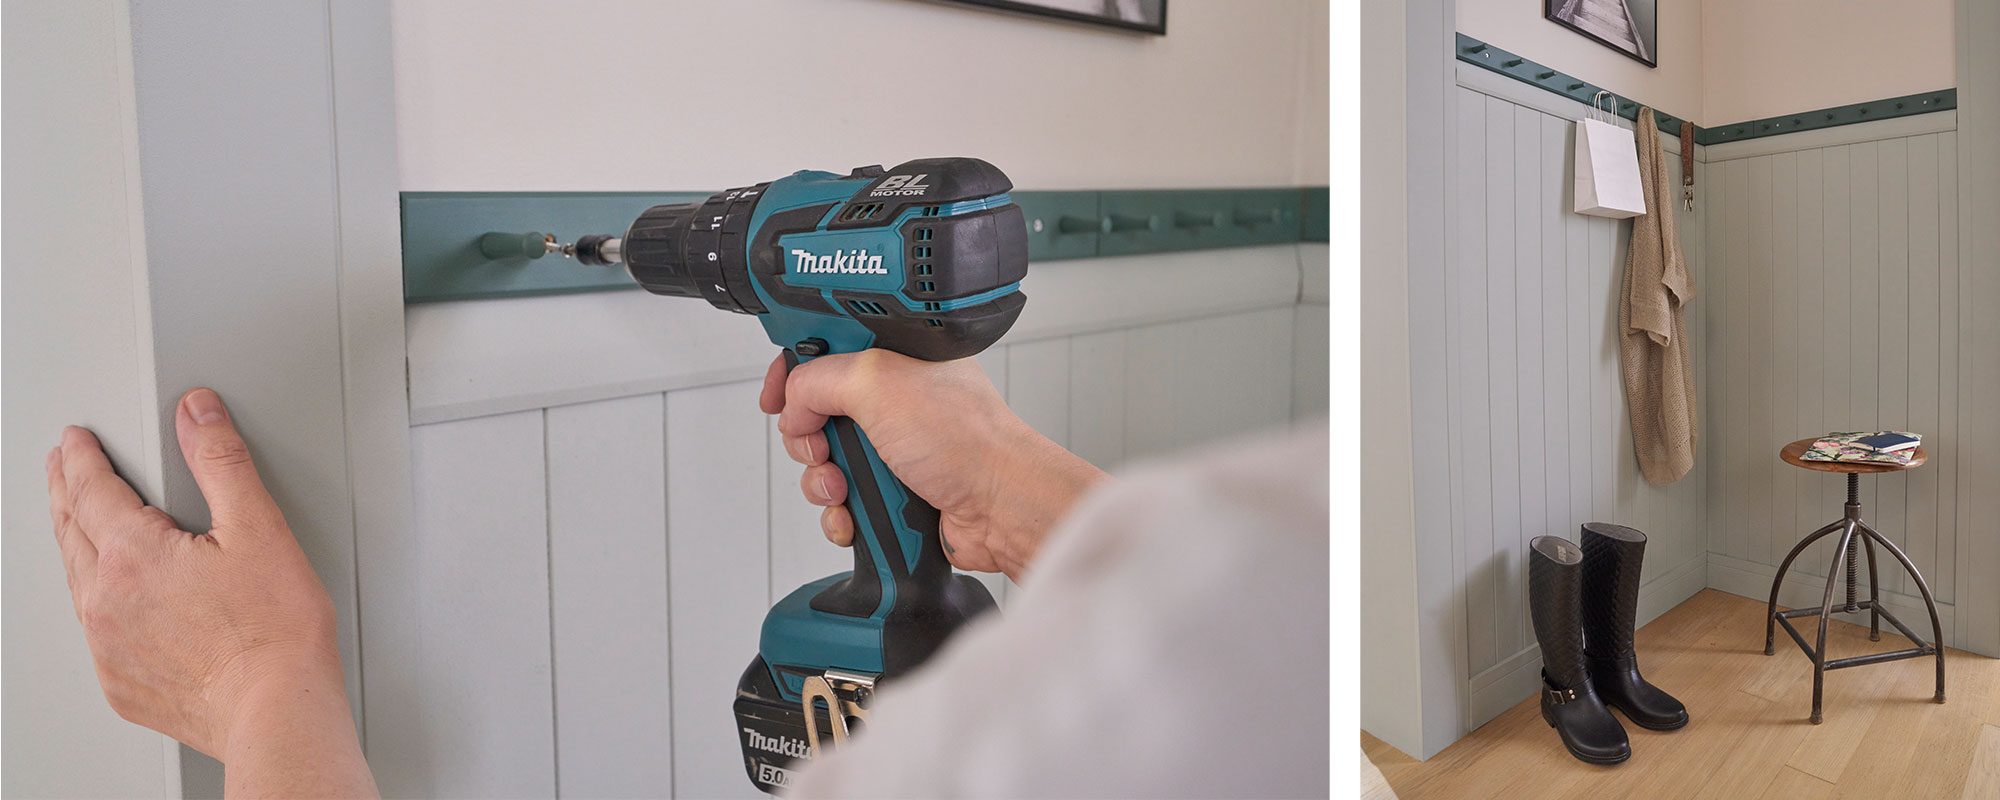
STEP 5: Fix the coat rack
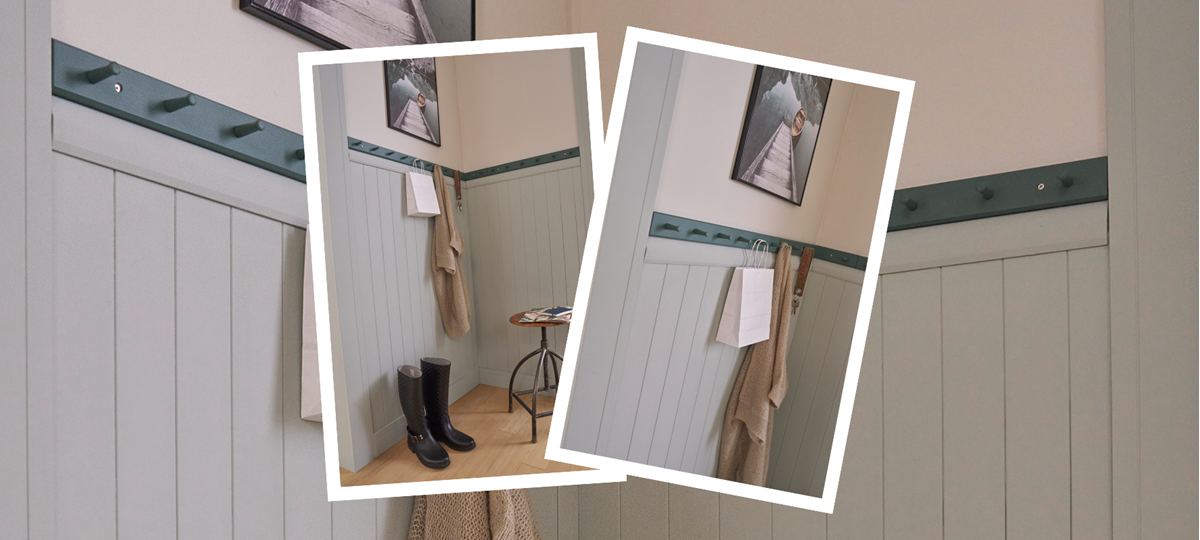
Once the paint is dry, fix your coat rack to the wall and there you have it! For other easy DIY projects with our decoflair products, make sure to check out our other blog articles.