Upgrade your hallway in 7 steps - easy chair rail DIY project with decoflair
Taking a room's atmosphere to the next level and transforming inconspicuous walls into strong highlights may seem like quite the challenge. However, with our decoflair products, you can quickly transform rooms in just a few simple steps.
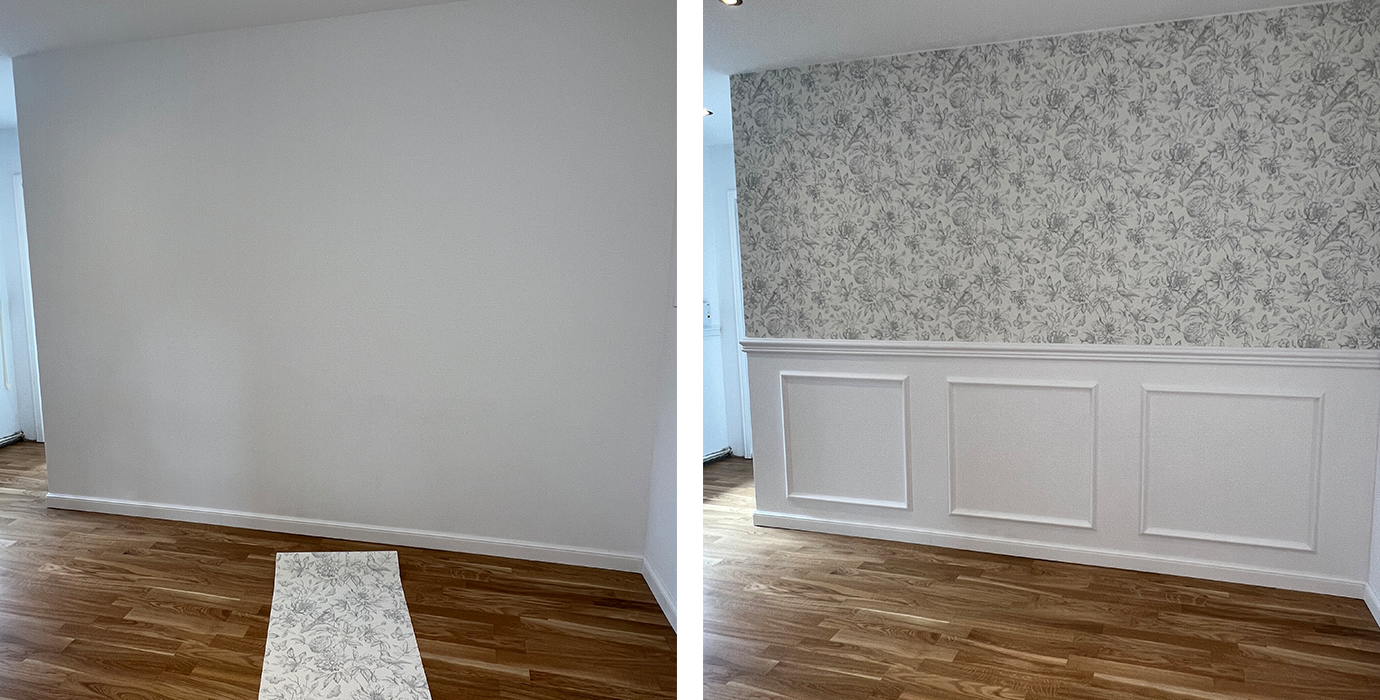
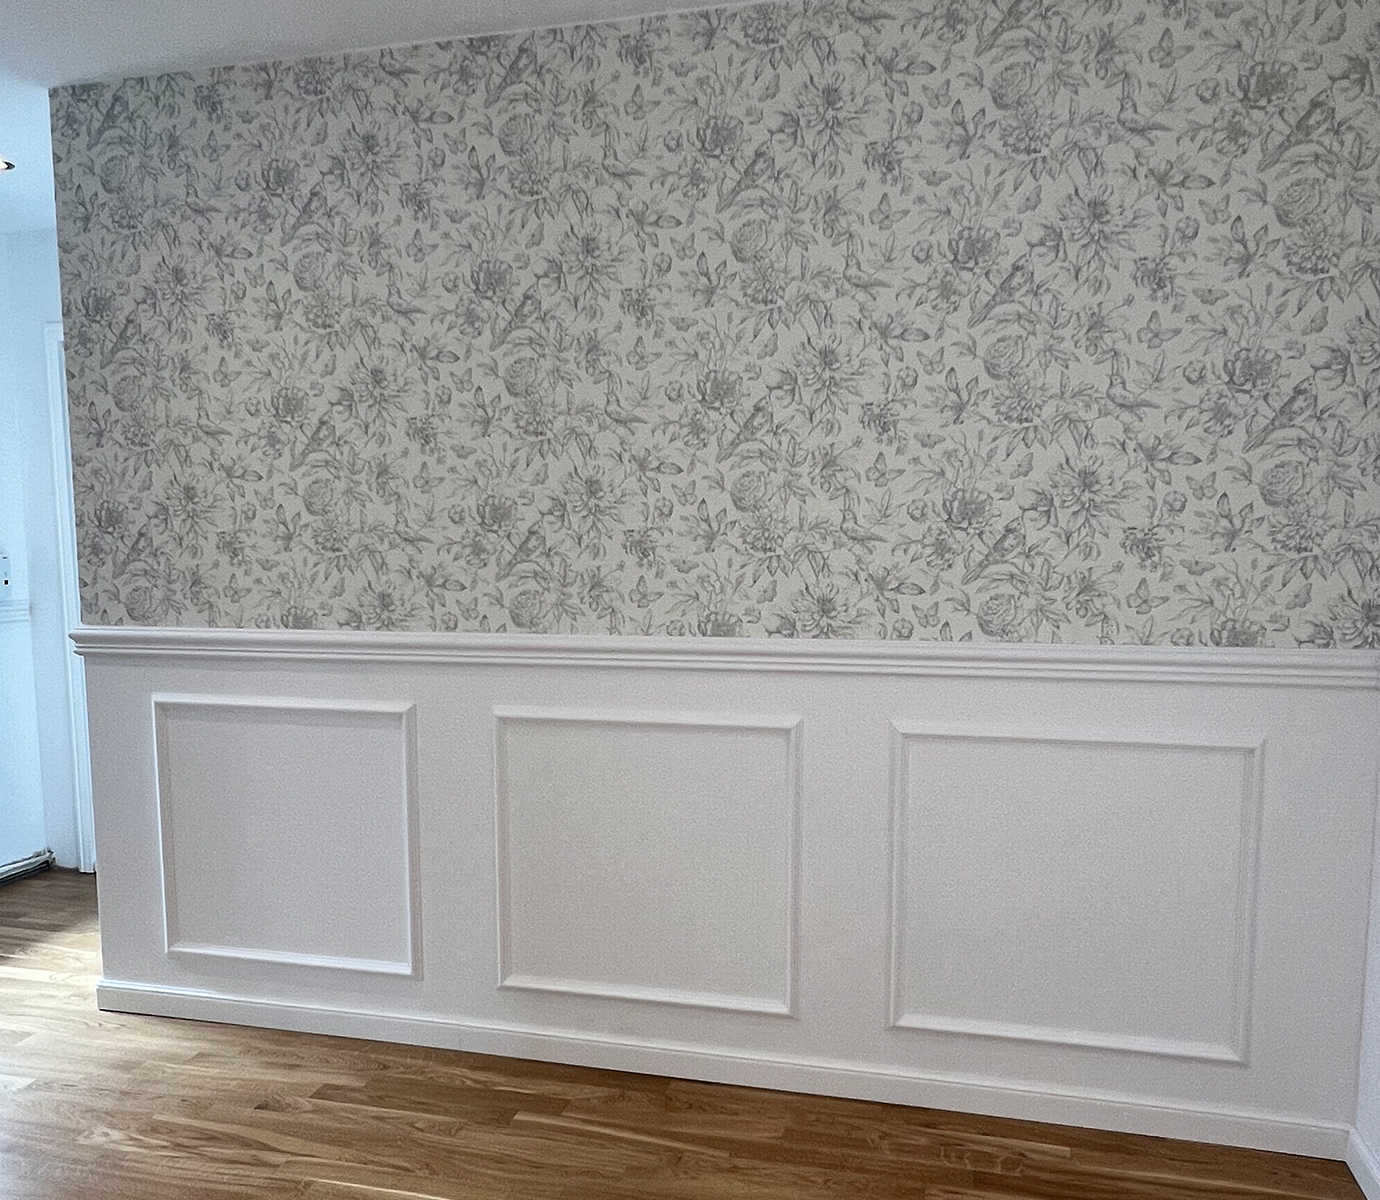
For this DIY project, we'll show you how to revive a hallway (or any other room) and turn a boring white wall into a special stand-out feature. Here are some before and after photos so you can really see the difference.
WHAT YOU’LL NEED
Depending on how you want to customise your wall and how big it is, you will need different quantities for your project. In this article, we will go step by step and show you how simple it is to install our decoflair products to give your home a unique ambience. Here is the list of what you need to recreate your wall in a similar way to our example:
Essential decoflair items
- decoflair C3 skirting (80x13x2000mm)
- decoflair CO3 chair rail (75x22x2000mm)
- decoflair CL1 chair rail (38x16x2000mm)
- decoflair CM500 glue
- Decoflair MB2 mitre box
Other must-haves
- Large tooth saw
- Wallpaper (to cover a surface of at least 1400x3100mm)
- Box cutter
- Cartridge applicator gun
- Spirit level
- Pencil
- Tape measure or folding rule
- Sanding paper 150 grit of finer
- Spatula, sponge or cloth
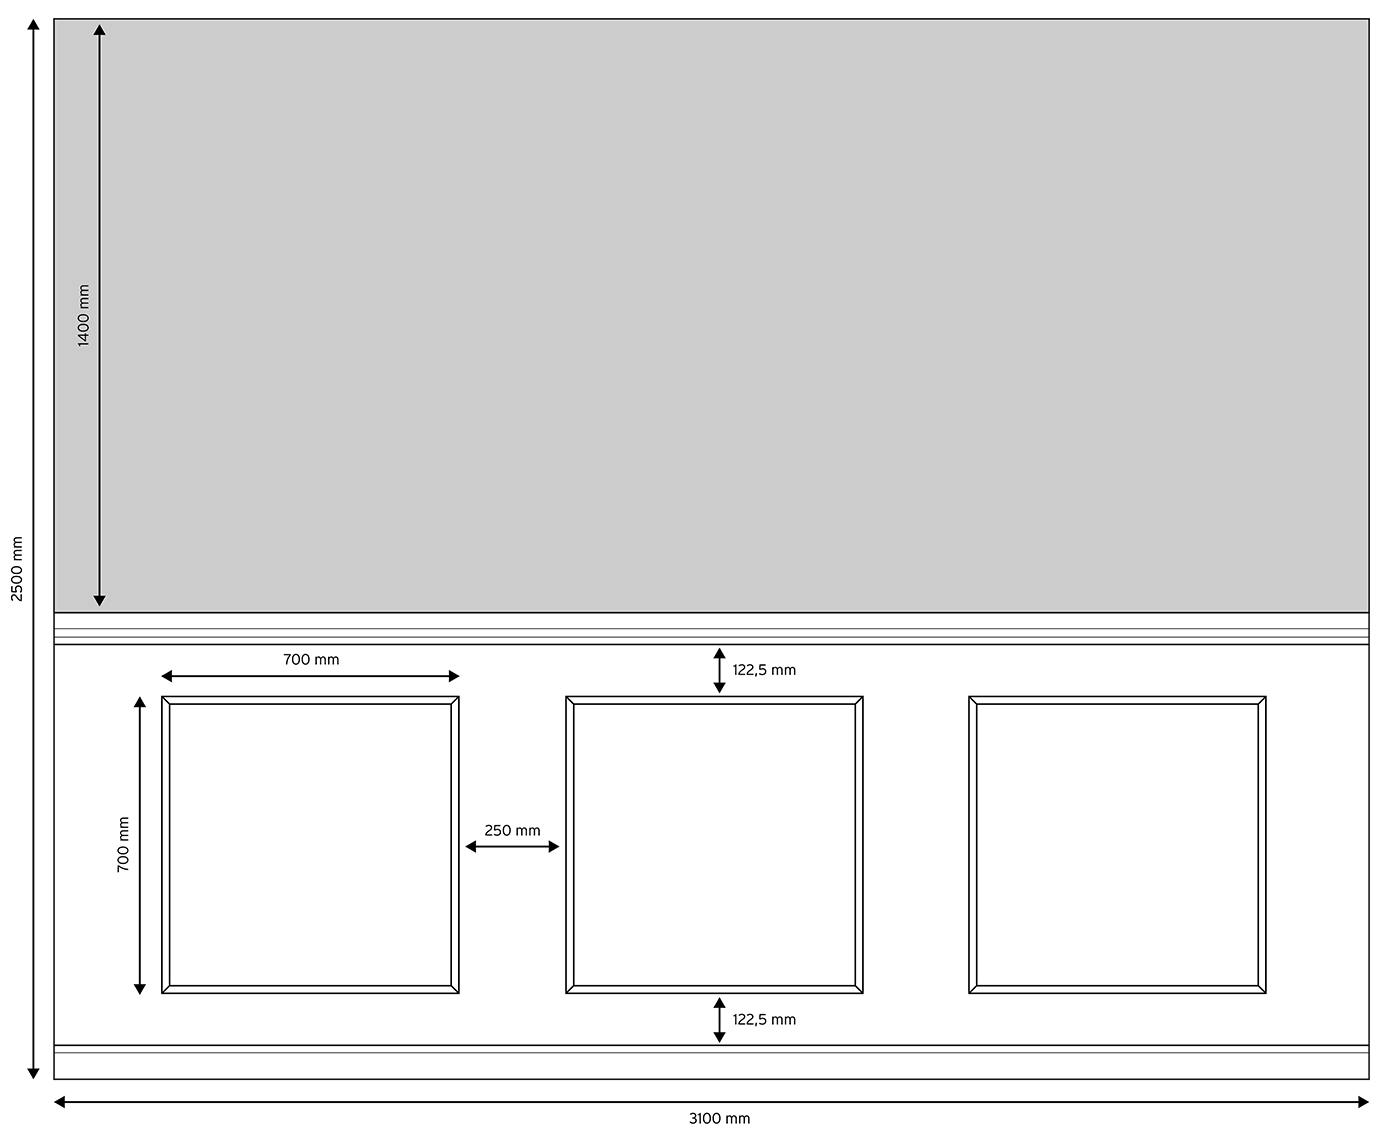
STEP 1: PLANING YOUR LAYOUT
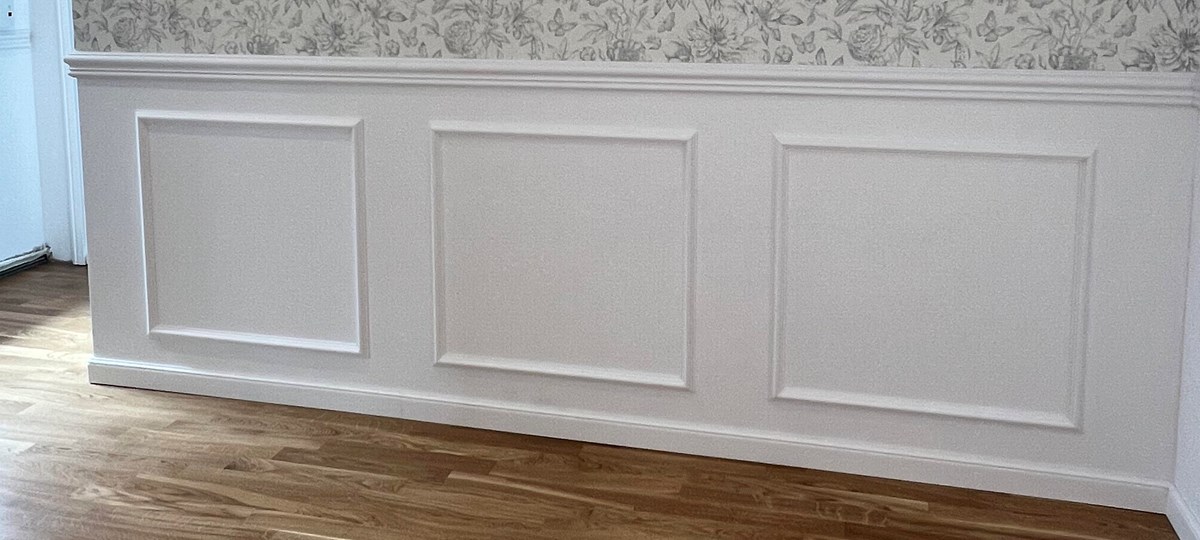
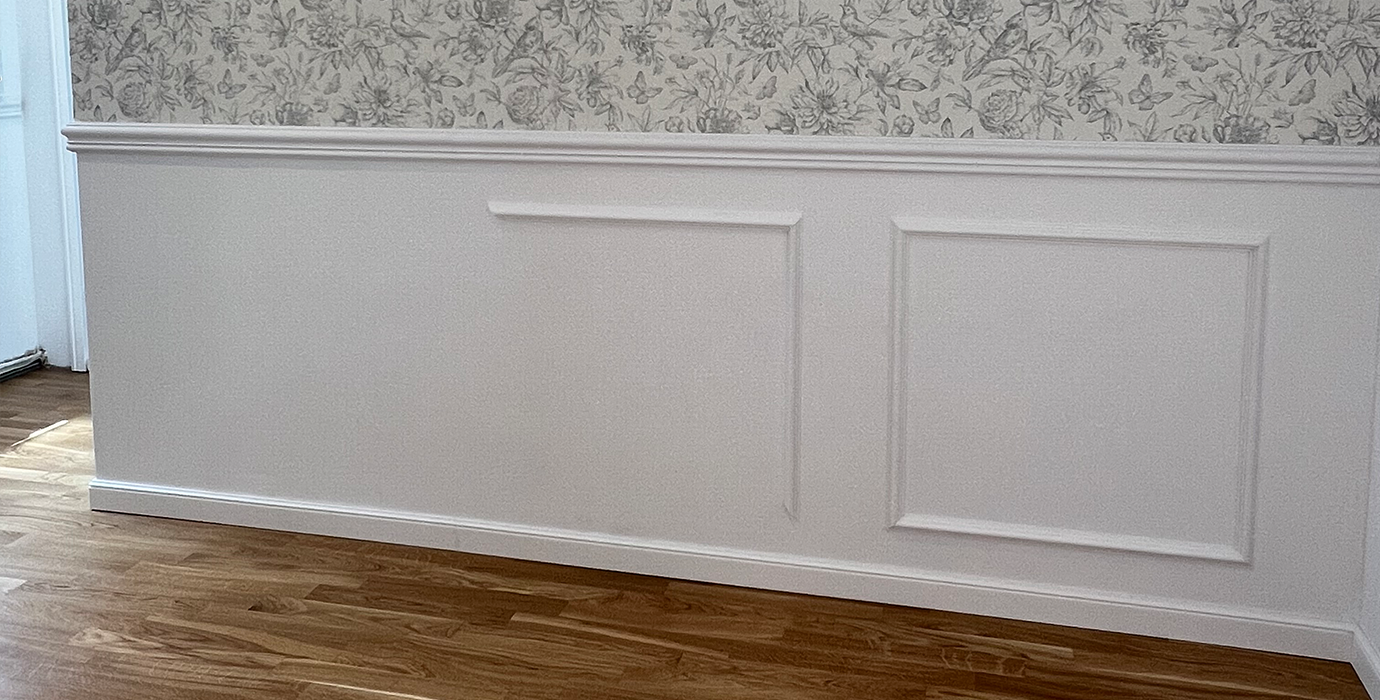
As always, planning is an important step. To give the hallway a classic charm, we decided to cover the lower third with a combination of elegant panel mouldings and a horizontal chair rail to top it off. The upper part of the wall, on the other hand, we covered with a floral wallpaper to complete the décor and enhance the "classic-chic" atmosphere.
STEP 2: CUTTING THE PROFILES
Now it's time to grab the mitre box and saw and cut the various profiles to size. Since corridor walls are quite prone to impact, you should go for profiles made of high-density polymer to ensure a long-lasting wall decoration. For the cuts, it is best to use a robust saw with large teeth (such as a Japanese saw or backsaw) to achieve a good finish.
Simple 90° cuts are required for the skirtings and the upper horizontal chair rail. To do this, place the profiles in the mitre box and saw them through the middle 90° slot.
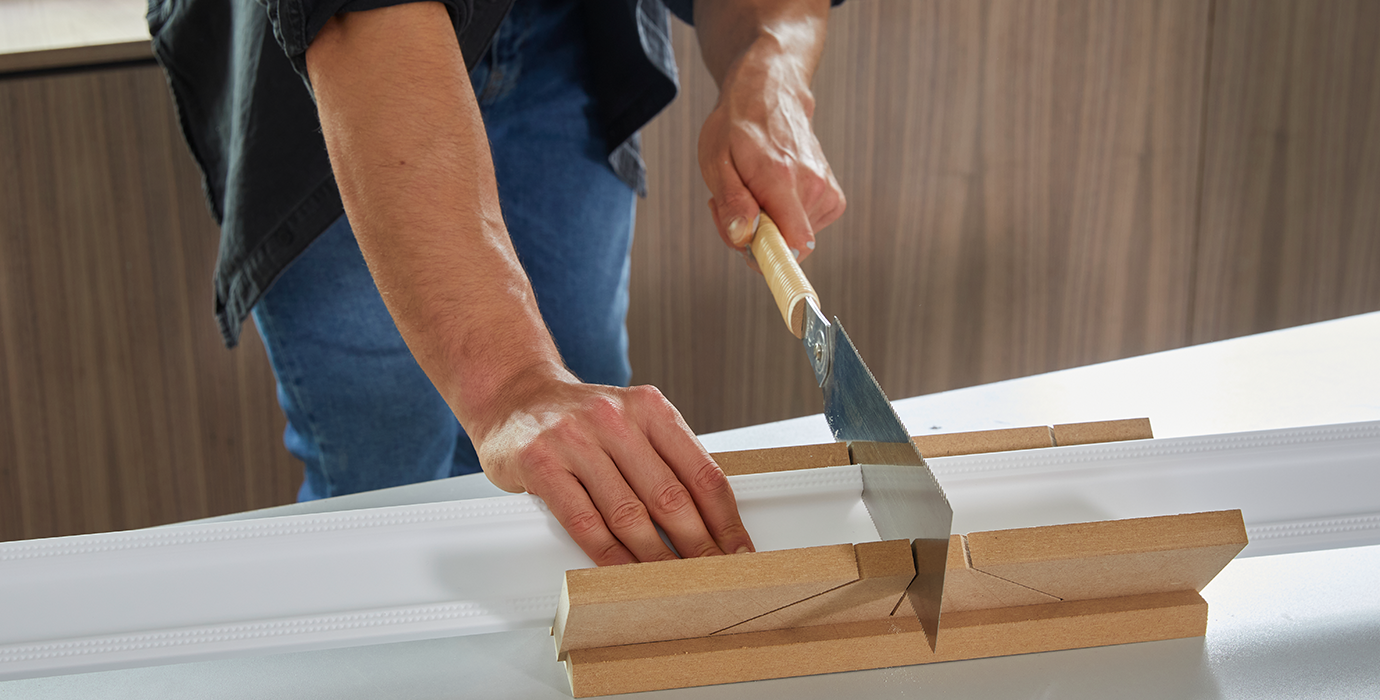
The frames, however, need 45° angles at both ends of the chair rails to fit properly. Saw the profiles at both ends through the 45° slots of the mitre box to get the right cuts to form a corner. The cut profiles should look something like this:
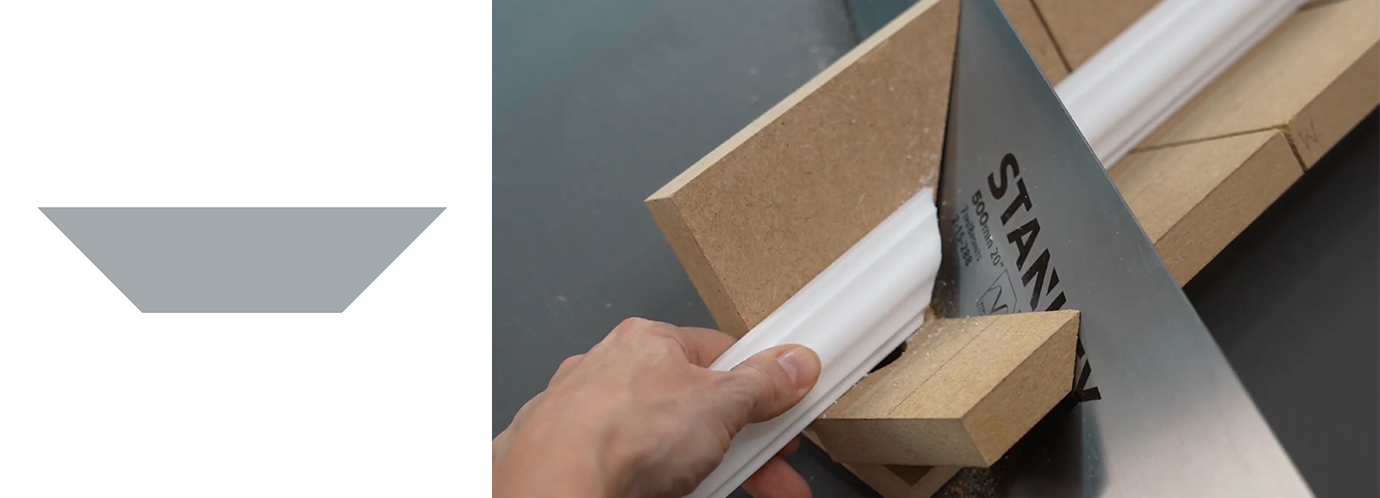
For a clean result, sand the cuts with 150 grit sandpaper or finer.
Insider tip: we have a simple solution to skip this step altogether! Our CL sets include pre-cut chair rails with which you can mount 39 x 59 cm frames in no time at all.
STEP 3: INSTALLING THE SKIRTINGS
Next, apply a narrow strip of decoflair glue to the back of the skirting using your cartridge applicator gun. Finally, fix the skirting by lightly pressing it with your fingertips to the wall.
Insider tip: Excess glue can be easily removed with a spatula, a damp sponge or a cloth.
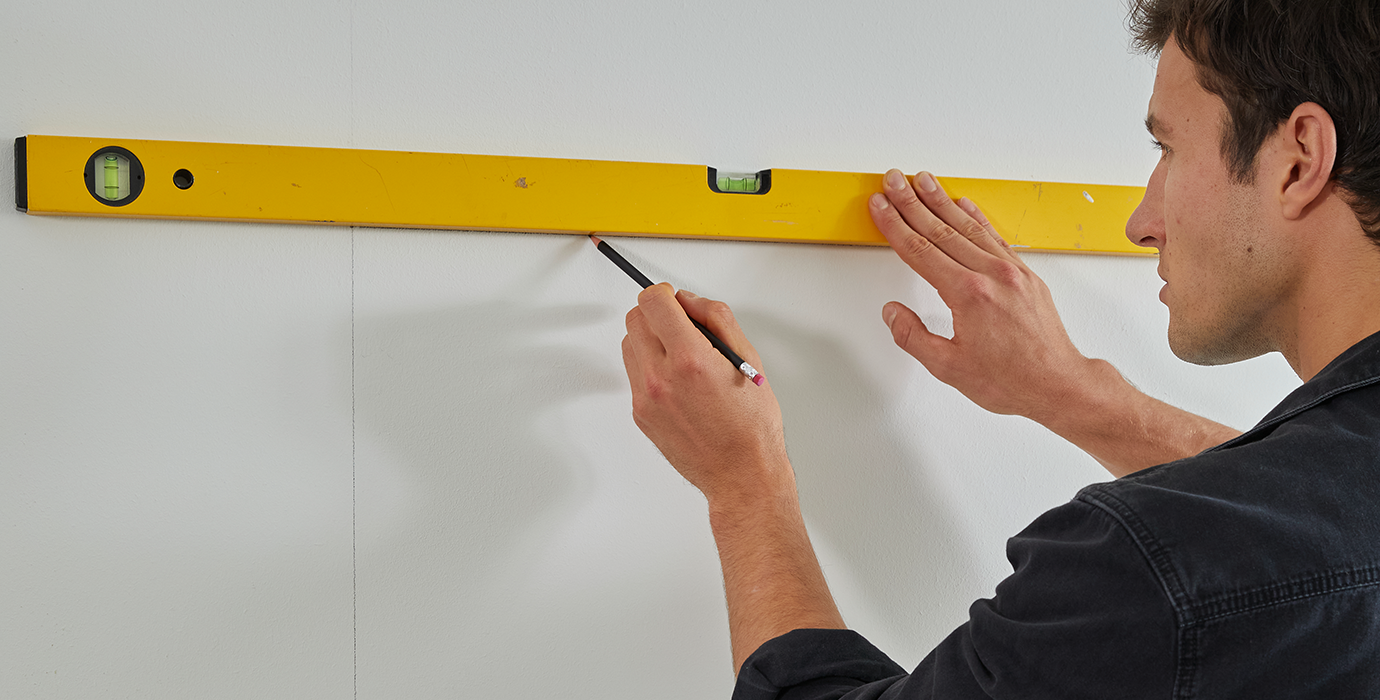
STEP 4: TRACING MARKINGS ON THE WALL
Use a pencil and spirit level to draw the markings on the wall where the chair rails are to be attached. Remember your plan from step 1 to help you do this.
STEP 5: HANGING THE WALLPAPER
Hang the wallpaper according to the manufacturer's instructions in the upper area. The lower end of the wallpaper will be covered by the horizontal chair rail, so no worries if it’s cut a little longer.
STEP 6: INSTALLING THE CHAIR RAILS
To install the chair rails, apply the glue on the backside of the profiles (just like you did for the skirtings, see step 4) and fix them along the previously marked lines. Let it dry for about 6 hours, then fill the joints with glue and remove the excess with a cloth, sponge or spatula.
SCHRITT 7: PAINTING THE PROFILES
Paint the underside of the wall in the colour of your choosing, and make sure to apply two coats of paint to the chair rails to achieve a clean result. When buying the paint, be sure that it is water-soluble emulsion paint, acrylic- or PU-based emulsion paint or alkyd resin paint. Now let it dry and you're done!
It's that easy to give your hallway a classic touch and make your home even more unique.
For more inspiration, make sure to check out our Instagram account!
Tag your posts with #decoflair so that we can see your projects and maybe even share them on our account.