IKEA Mirror Hack – 6 easy steps to create your own industrial mirror with decoflair
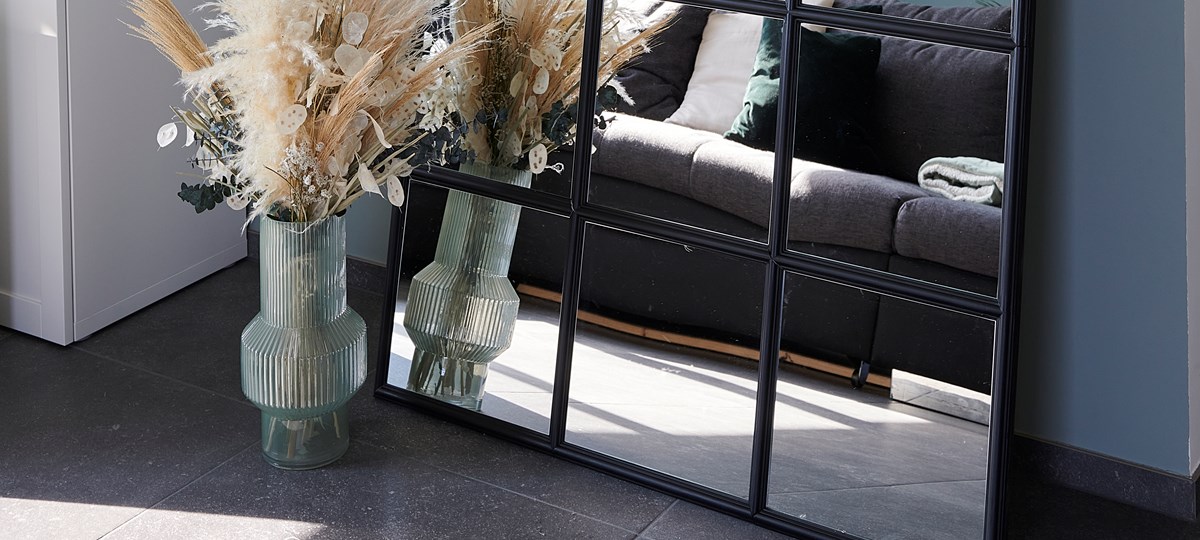
Industrial style mirrors are all the rage right now, and rightly so! Not only do they add a modern touch and seamlessly slip into multiple interior styles, they also give the illusion of space.
For this DIY project, we have devised an easy step-by-step guide so you can make your own industrial mirror using our decoflair products!
WHAT YOU’LL NEED
The quantities and measurements here are for a 100 x 197,5cm mirror like the one we made. You can, of course, choose to go for another size, the step-by-step process will remain the same in all cases.
Essential decoflair items
- 8 lengths of the decoflair CL1 chair rail (38x16x2000 mm)
- 2 cartridges of our Decoflair CM500 glue
Other must-haves
- 5 packs of IKEA 'LOTS' mirrors (300x300mm) (4 per pack)
- MDF sheet (100x197,5cm) à make sure it’s at least 2 cm thick
- 2 cans black spray paint (400ml)
- Cartridge applicator Gun
- Circular saw
- Spirit level
- Pencil
- Tape measure or folding rule
- Some sanding paper 150 grit or finer
STEP 1: WORK OUT THE MEASUREMENTS AND GET WHAT YOU NEED
All calculations are based on the size and number of mirrors.
We went for a 3 x 6 mirror which meant we needed to buy 18 mirror tiles in total. Our mirror tiles are square (30x30cm) and the CL1 chair rails are 2,5cm wide. Knowing all this, it was time for us to work out our measurements and quantities!
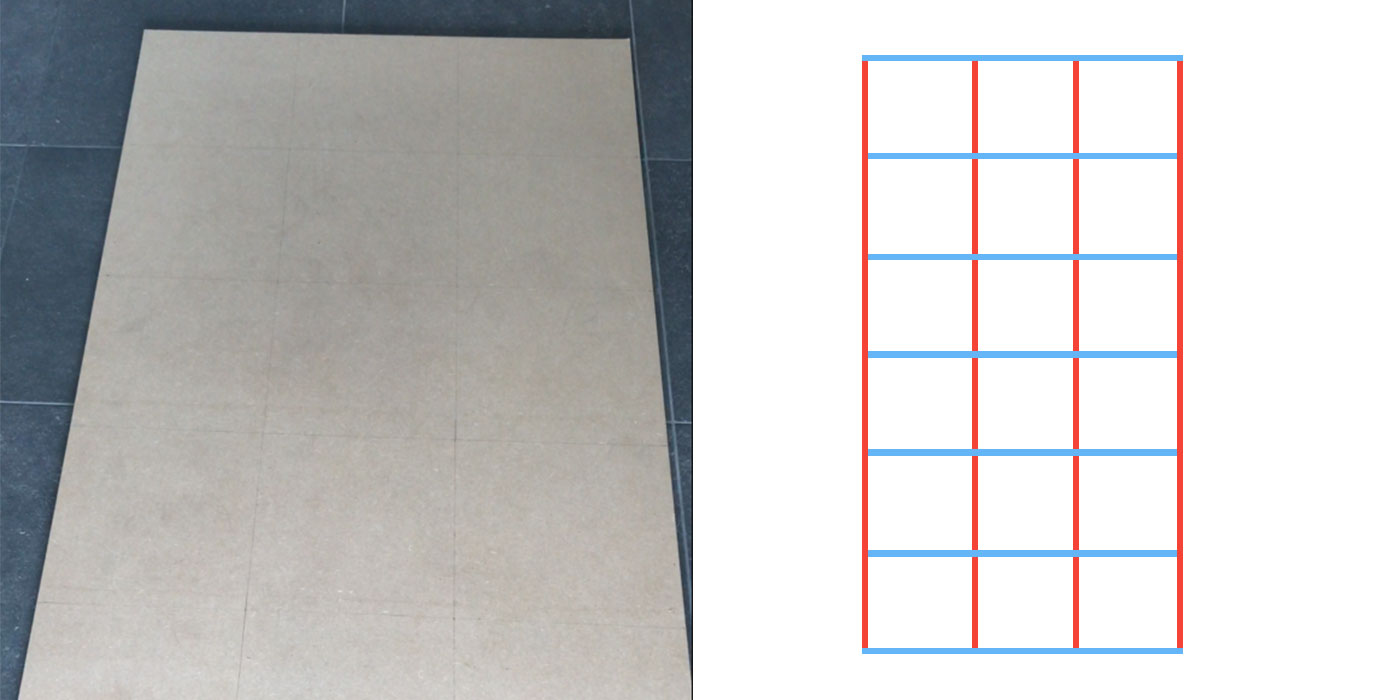
1. Determine size of your MDF sheet
Height of MDF: (#mirrors x mirror height) + (#chair rails x chair rail width) = (6 x 30) + (7 x 2,5) = 197,5 cm
Width of MDF: (#mirrors x mirror width) + (#chair rails x chair rail width) = (3 x 30) + (4 x 2,5) = 100 cm
Once you’ve cracked the math, go to your local DIY store where they will be able to cut an MDF sheet to size for you.
2. Determine amount of chair rails you need
Total amount of chair rails in cm: (#columns x height of MDF) + (#rows x width of MDF) = (4 x 197,5) + (7 x 100) = 1490cm = 14,9m rounded up to 15m.
This means we need to buy 16m of chair rails as they are only sold in units of 2m.
Insider tip: mapping it all out on paper is a simple and effective way to make sure your measurements and quantities are right.
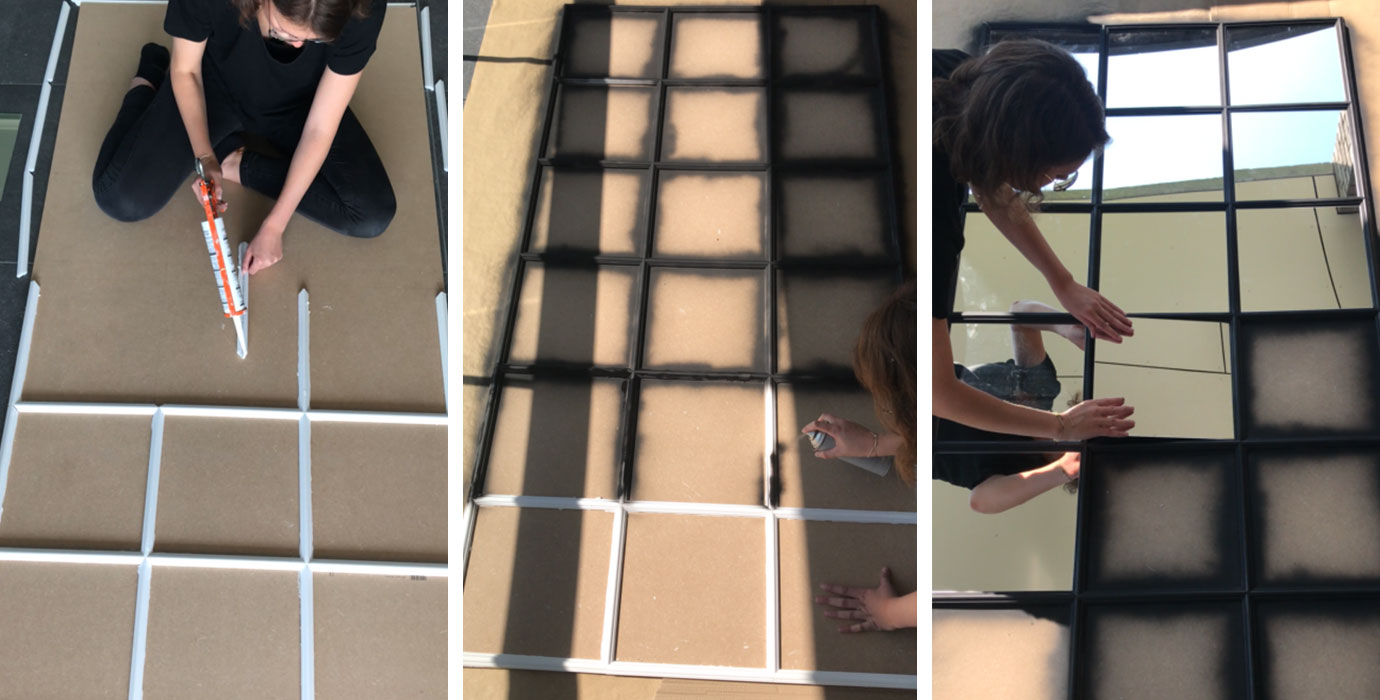
STEP 2: CUTTING THE PROFILES
Now you’ve got everything you need, it’s time to get busy!
Before you saw the chair rails to fit your layout, it is of high importance that you not only think about the length of the profiles but also what type of cut they will need to have.
1. The three types of cuts1. The three types of cuts
In order for the profiles to interact smoothly with each other and give your industrial mirror that custom and clean look, it is important to cut them in a specific way. Here’s a small graph of how all types interlock. As you can see, there are three types of cuts. Here’s how we worked out how many of each we needed for our industrial mirror.
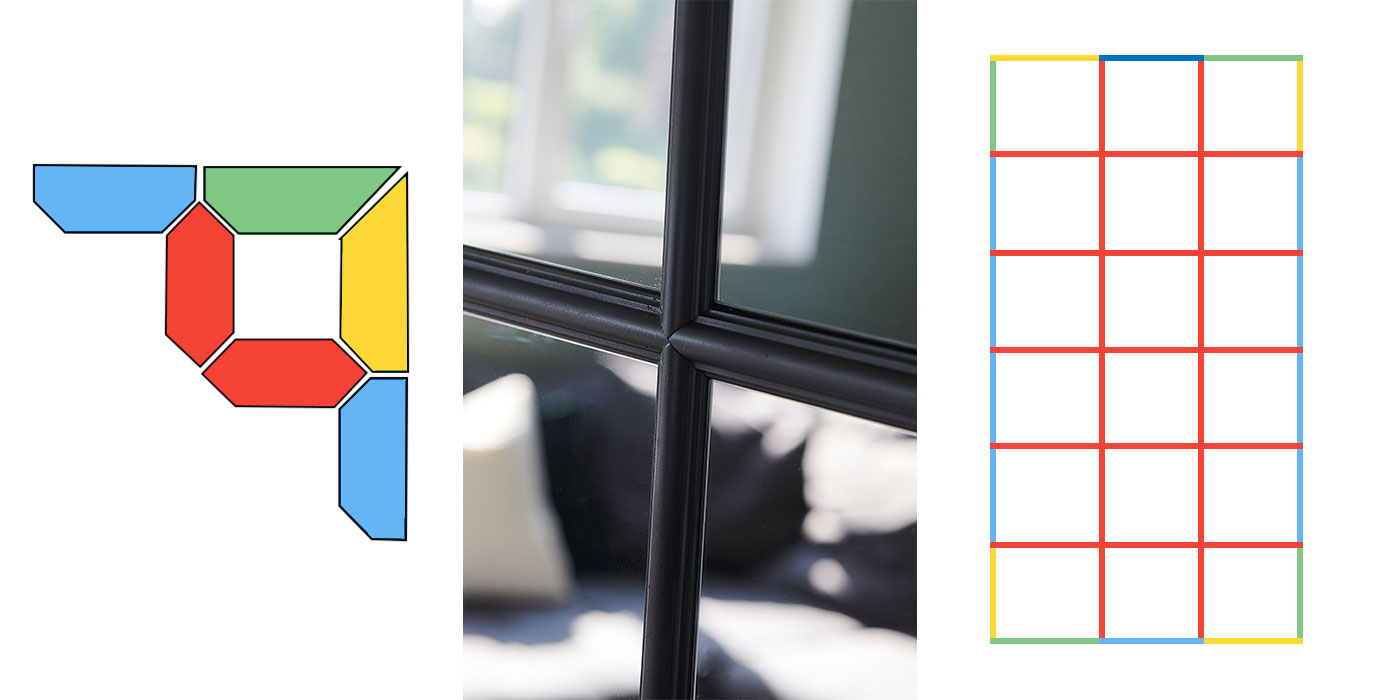
4 cuts of type A
4 cuts of type B
10 cuts of type C
27 cuts of type D
2. Getting each type of cut right
Here’s a short instruction on how to cut each type.
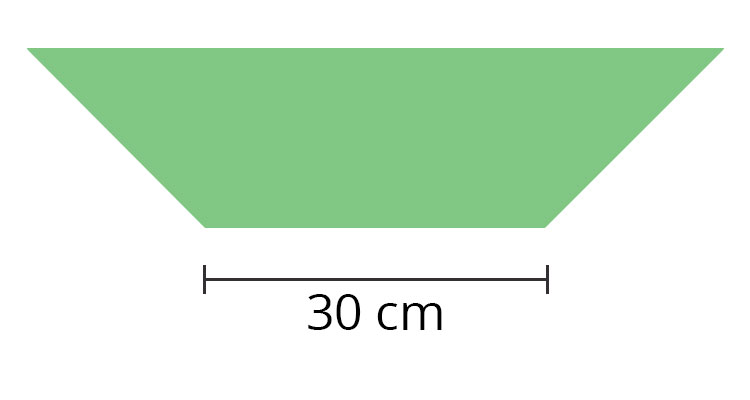
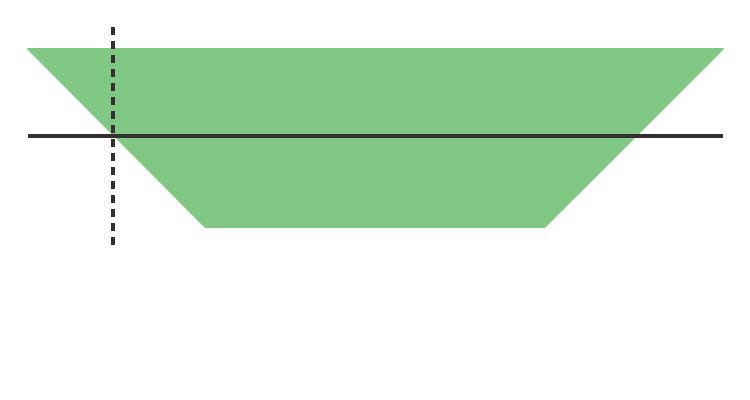
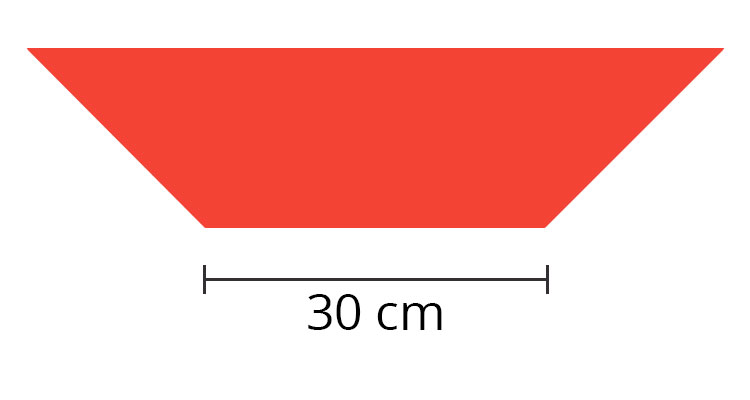
| Type A: start by cutting a 45° interior angle with a circular saw on the end of your chair rail. Then measure 30cm on the inside of the chair rail and cut a 45° angle again. Once this is done, your chair rail should look like this with an interior side of 30cm: |
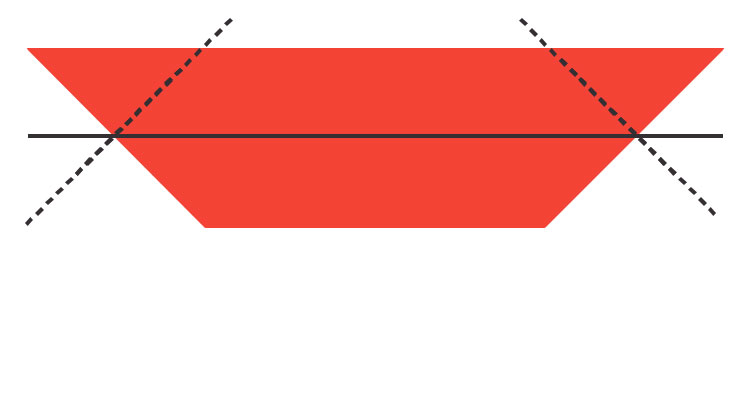
Once you have this shape, measure the middle of the left 45° cut edge and mark it with a pencil. |
 |
 |
Repeat this process 4 times and you will have your A cuts covered.
|
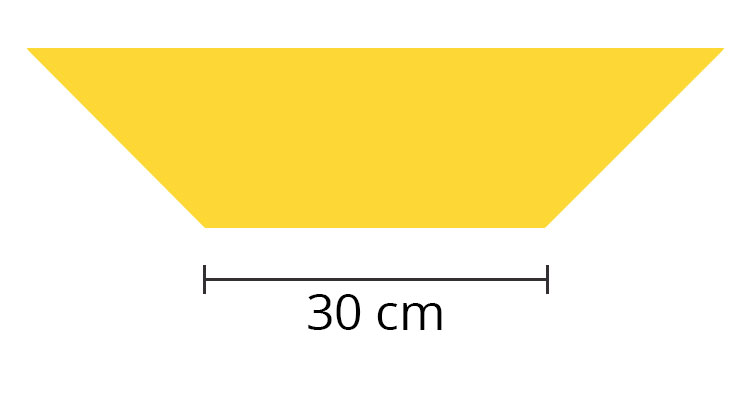
Type B: repeat the same steps as for type A until you get this shape. |
Then measure the middle of the right cut edge of the chair rail and cut straight like this: |
 |
 |
Once all you A and B cuts will be done, you will have you corners covered.
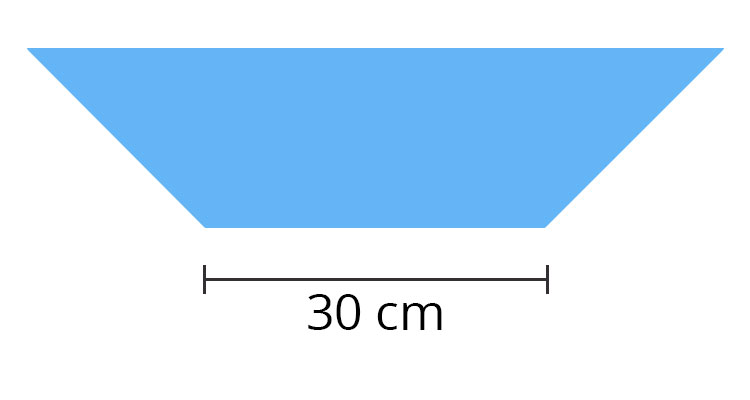
| Type C: Cut two 45° corners so that the smaller side of the chair rail is 30cm long. | Once you’ve got this shape mark the center of the cut at 90° on both sides of the chair rail. Once this is done, make two straight cuts on your two pencil lines. |
 |
 |
Repeat this process 10 times to get your C cuts and edges covered.
|
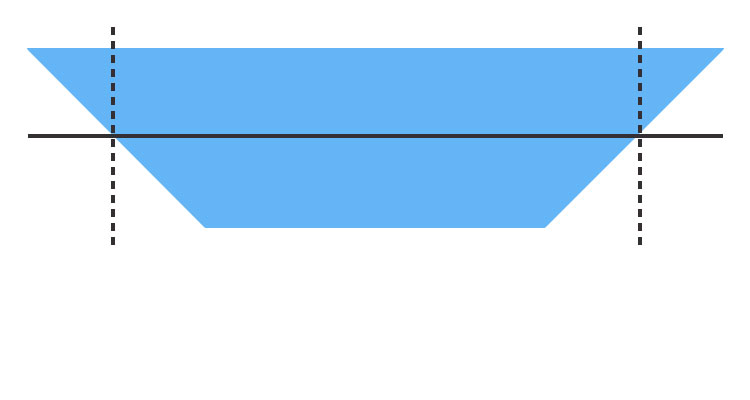
Type D: Repeat the same steps as for cuts A and B until you get this shape: |
Once again, mark the center of the cut at 45° on both sides. Once this is done, cut 45° inside angles from the two pencil marks. |
 |
 |
Repeat the process 27 times to get your D cuts and inside borders covered.
Insider tip: sanding the edges of your cuts will smoothen the ends and give a clean result. Using 150 grit sandpaper or finer, make a brushing motion in one direction to get those cut edges as smooth as possible.
STEP 3: CHECK BEFORE YOU STICK
Before you start fixing everything to the MDF sheet, it’s better to check if your cuts and dimensions are all correct. Lay out all your cut chair rails and mirror tiles on the MDF sheet and see if it all fits. If this is the case, remove the mirrors and grab your pencil! Trace the outline of your placed chair rails on the MDF sheet, this will help you to stick them later.
STEP 4: FIX THE CHAIR RAILS
Using a cartridge gun, apply a fine strip of glue on the back side of each chair rail and fix them, using a bit of pressure, to the MDF sheet. You can wipe away any excess glue with a cloth. Let the glue dry and set for about 6 hours before you move on to the next step.
STEP 5: PAINT THE CHAIR RAILS
Using your spray paint can, cover the fixed chair rails and outer sides of your MDF sheet with two layers of paint and let it rest for a few hours before moving on to the final step.
STEP 6: FIX THE MIRROR TILES
All that is left to do is stick your mirror tiles onto the MDF sheet. Use double sided paper tape (often provided with the mirrors) to fixate the tiles.
And there you are! Your very own decoflair industrial style mirror that you made all by yourself (you can give yourself a light pat on the back).

Associated products

Decoflair CM500 (310 ml)
Glues
68 mm x 235 mm x 48 mm (1 pc / pc)