Getting that wow effect – DIY wallpaper + chair rail combo and how to get it done
We have a new DIY project for you to try out where we’re going to show you how to easily pull off a fabulous chair rail and wallpaper combo to make your wall(s) stand out and your room unique.
We briefly spoke about this kind of set up in our “5 ways to make the most of your chair rails” article but we felt like giving you a full instruction on how to do it yourself because it’s such a stunner!
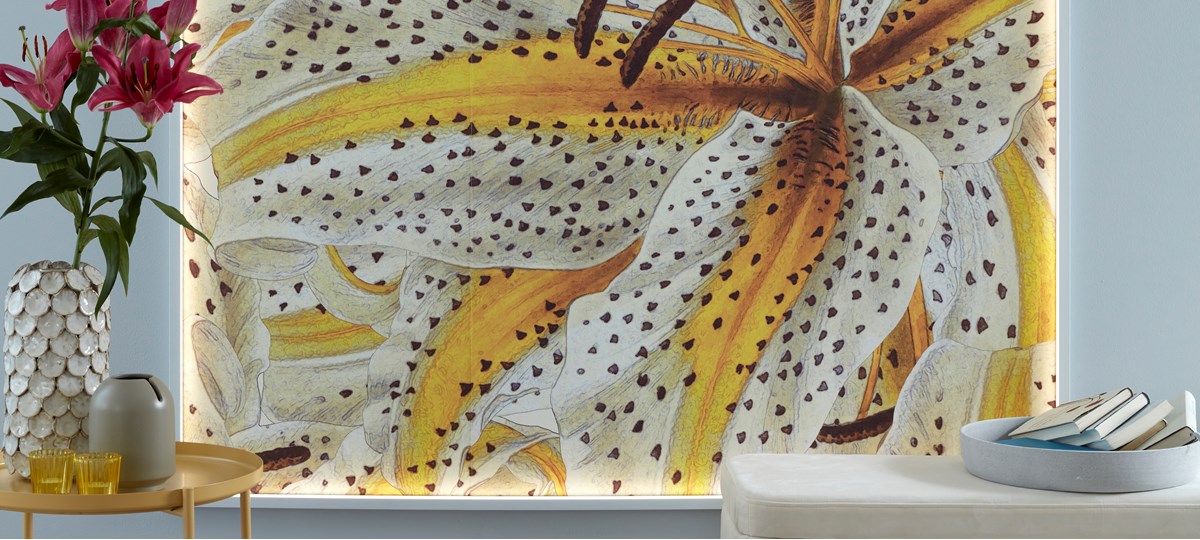
To make this set up even more special, we decided to integrate indirect lighting, turning it into a unique eye-catcher.
WHAT YOU’LL NEED
The quantities and amounts you will need for your project vary according to your wishes, of course. Through this article, we will give you an insight on the step-by-step process, which always remains the same. Here’s what was needed for this project:
Essential decoflair items
- 3 lengths of the decoflair CL14 lighting chair rail (20x25x2000mm)
- 1 cartridge of our decoflair CM500 glue
- Decoflair MB2 mitre box
Other must-haves
- Large tooth saw
- At least 5m of LED light strip (max 15mm wide)
- A piece of at least 1000x1500mm of peel-and-stick wallpaper
- Putty knife
- Box cutter
- Cartridge applicator gun
- Spirit level
- Set square
- Pencil
- Tape measure or folding rule
- Sanding paper 150 grit or finer
- Spatula, sponge or cloth
STEP 1: PLANNING YOUR LAYOUT
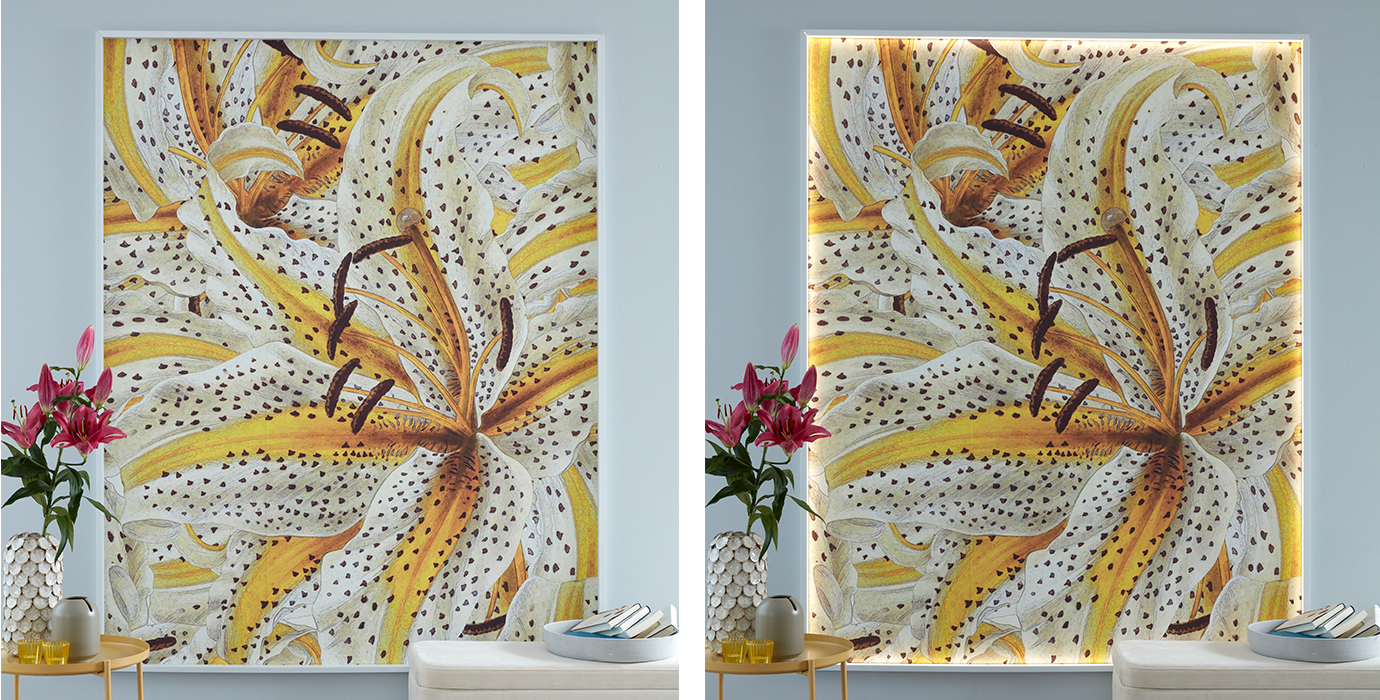
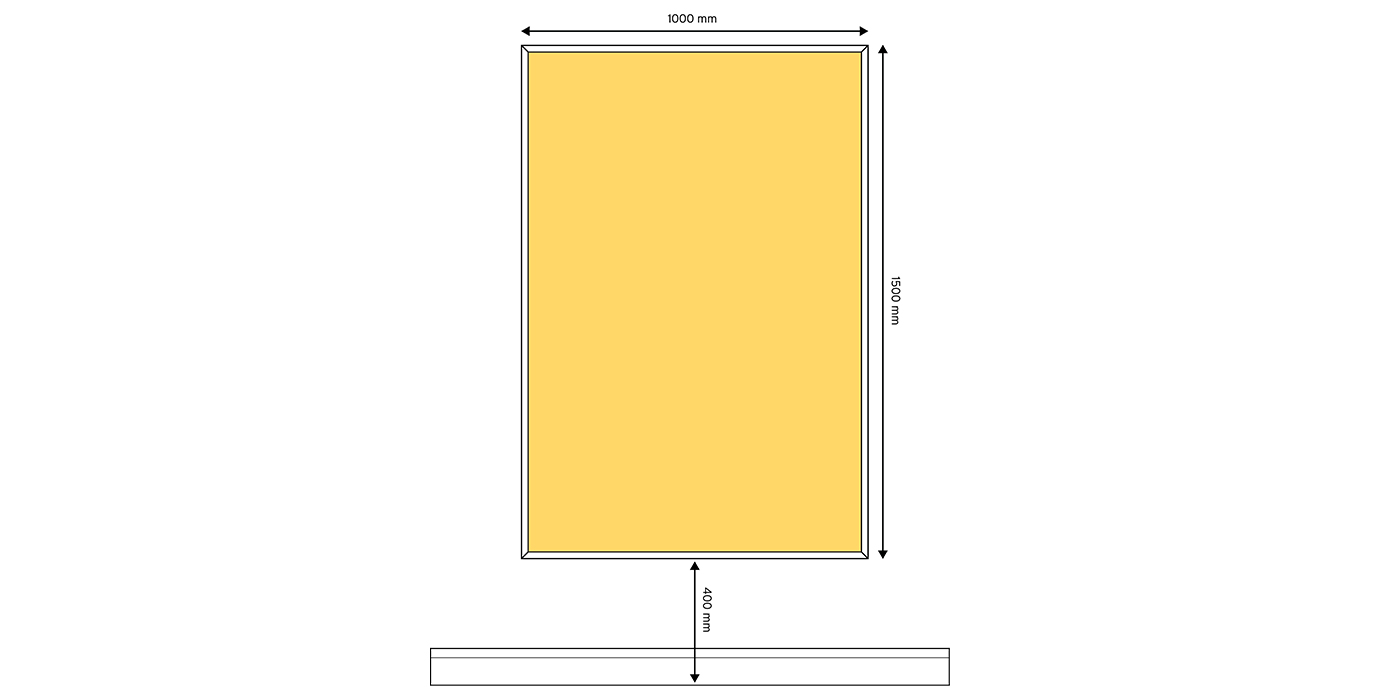
Planning is always an important step. We decided to go for a 1000x1500mm frame to mimic a nicely framed painting or picture. We also decided to not fix it too high on our wall to make it a real stand out feature that compliments the nearby furniture and decoration.
STEP 2: CHOOSING YOUR WALLPAPER
We decided to choose peel-and-stick wallpaper (also called self-adhesive wallpaper) for our project as it is one of the easiest types to install, avoiding messy situations involving wallpaper paste and they are usually good quality and durable. Make sure the application surface is clean, smooth and dry before application and the wallpaper will adhere correctly. You can also decide to go for classical paste-the-wall wallpaper if you wish of course.
STEP 3: CUTTING YOUR WALLPAPER TO SIZE
On the backside of your wallpaper, trace the length and width of your chair rail frame taking away 10mm from both dimensions to have a good fit for the wallpaper. In our case, since we were preparing a 1000x1500mm frame, we needed to cut a 990x1490mm piece of wallpaper. Once you’ve traced the measurements with a pencil, cut the wallpaper out to size.
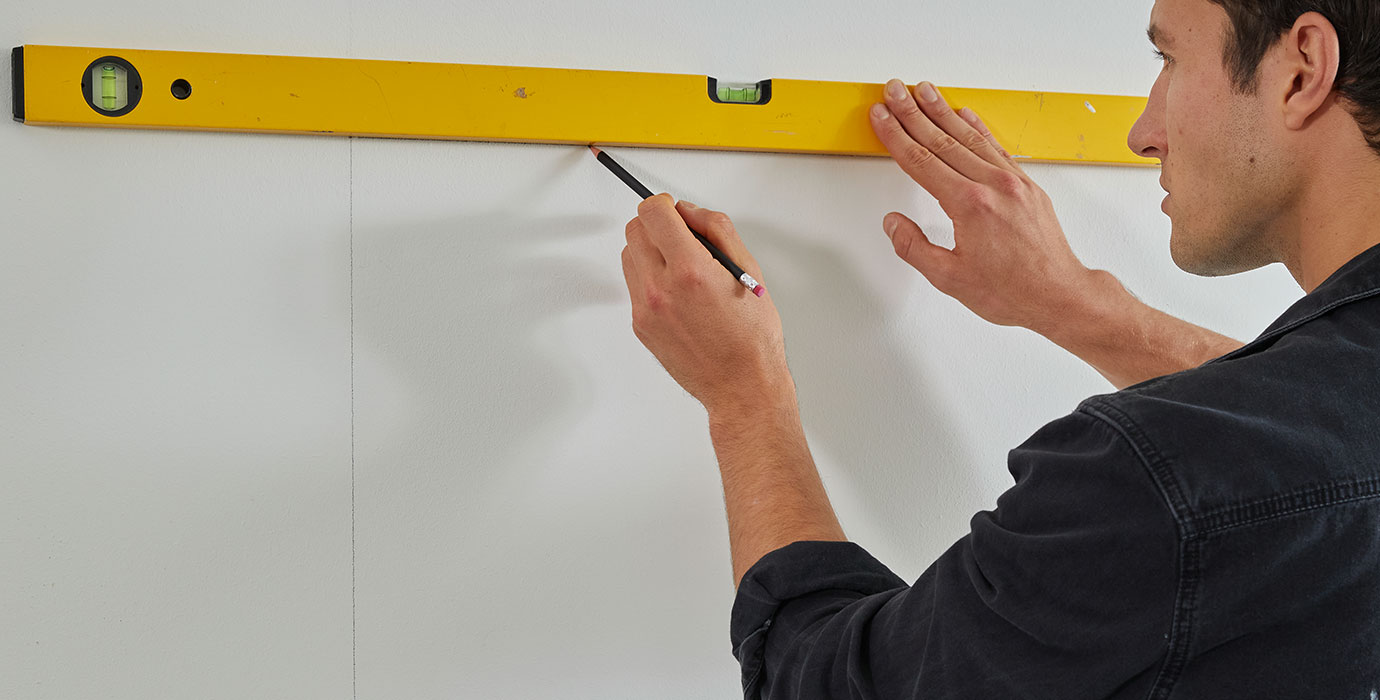
STEP 4: MARKING MEASUREMENTS ON THE WALL AND HANGING WALLPAPER
Once you have figured out how you wish to arrange you display, grab your pencil and spirit level and start tracing the lines where you will be fixing your wallpaper and chair rails to the wall. Start off by tracing the outlines of you wallpaper (in our case the 990x1490mm frame), then trace the larger frame (in our case 1000x1500mm) where the chair rails will be applied around it. Once this is done, hang the wallpaper according to the manufacturer’s instructions on your markings with a putty knife and move on to the next step.
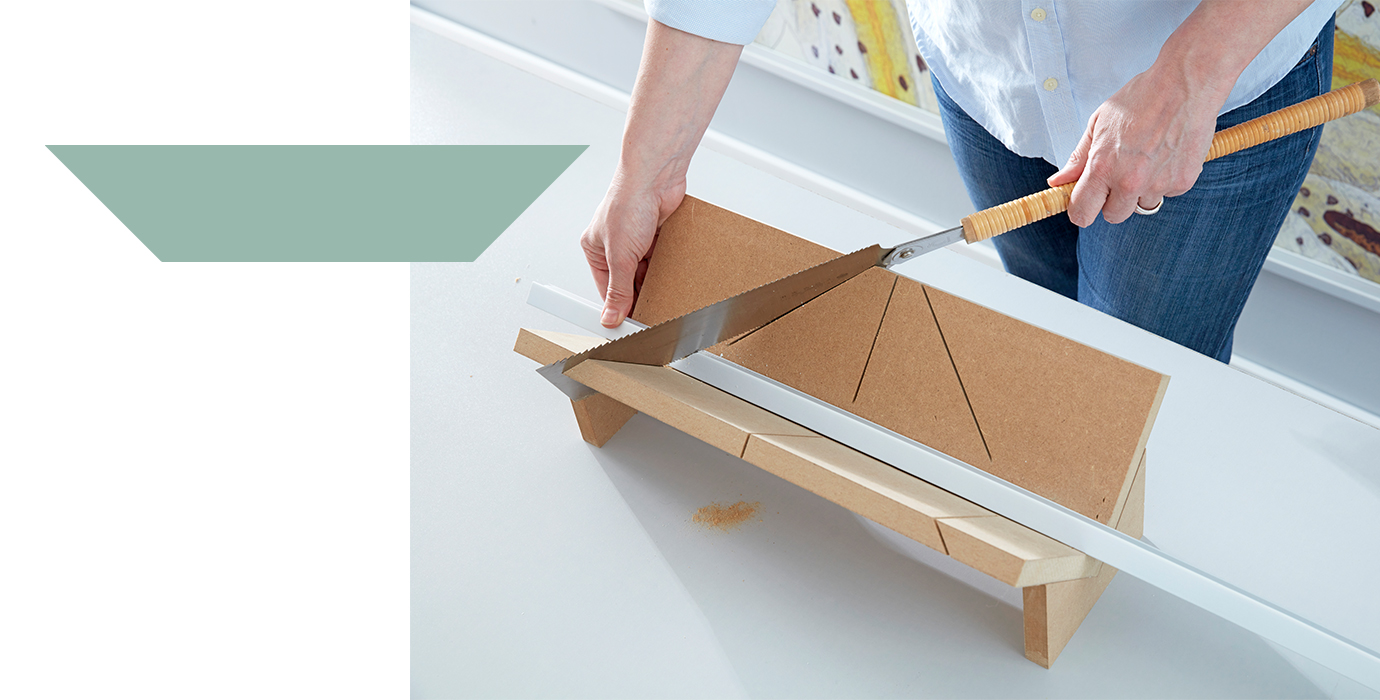
STEP 5: CUTTING THE PROFILES
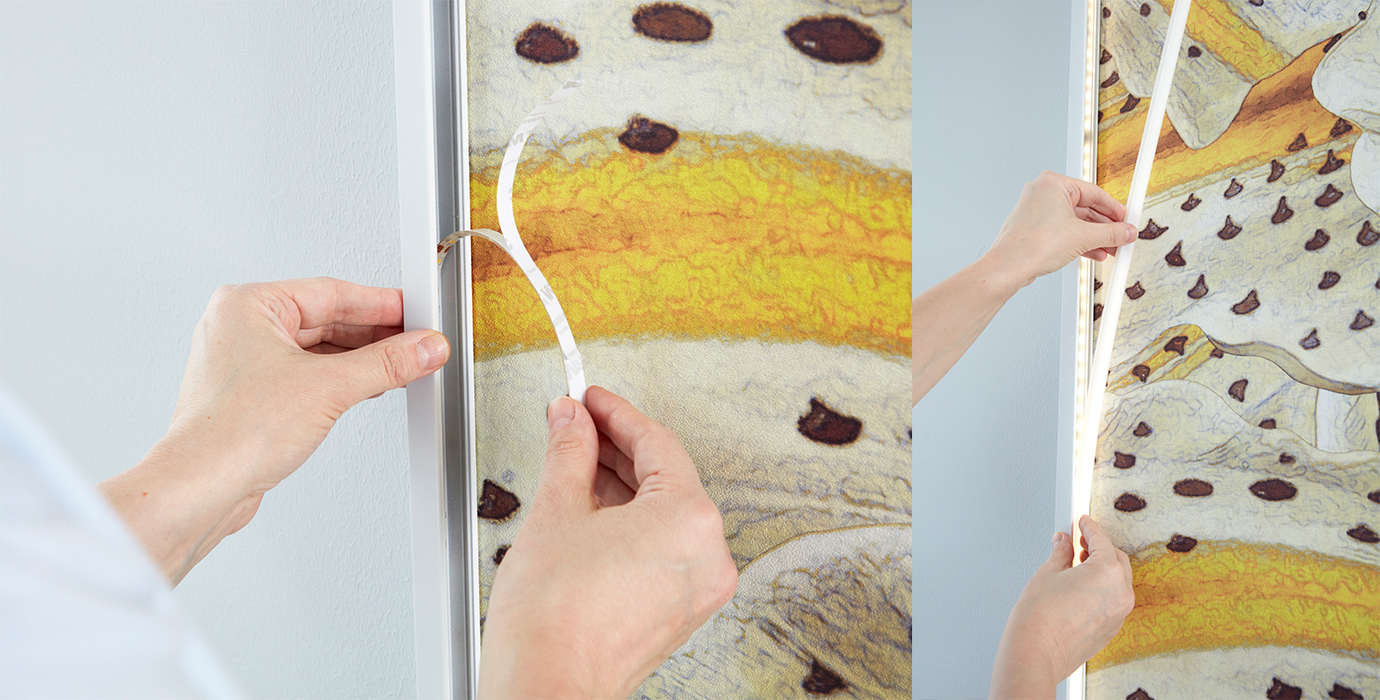
With your measurements figured out and your wallpaper hanging on the wall, it’s time to cut the lighting chair rails. Cut two 45° interior angles on both ends of the chair rails using a mitre box and saw or circular saw. Make sure to cut the profile so that the short side facing inside the frame is the one with the diffuser, where the light will come from to highlight your wallpaper. If you’re using the CL14 like we have done here, simply leave the diffuser clipped in and cut it at the same time as the chair rail.
When you’re done, your cut profile should look like this:
Insider tip: after cutting, use 150 grit or finer sanding paper to make the edges as smooth as possible to get a clean result.
STEP 6: FIXING THE CHAIR RAILS
Using the cartridge applicator gun, apply a fine stripe of decoflair CM500 glue on the side of the chair rails. Make sure to apply the glue so that when fixed, the side with the diffuser is facing inside the frame for the chair rails to highlight the wallpaper. Then fix your chair rails on your pencil marks and let the glue dry for at least 6 hours before moving on to the next step.
Insider tip: you can remove any excess glue when fixing the chair rail using a spatula, damp sponge or cloth.
STEP 7: INTEGRATE LIGHTING AND HOOK IT UP TO A POWER SOURCE
Once your lighting chair rails are fixed and the glue is dry, peel off the diffusor to reveal the base of the chair rail, where you will stick your LED strip. Simply follow the LED manufacturer’s instructions to install the lighting strip and get in touch with a qualified electrician to get it hooked up to a power source. Once it’s done, simply clip the diffuser back on and there it is!